Testing electron app on Ubuntu linux is easy with VirtualBox and an Ubuntu ISO. All you need to do is some configuration to share your electron app between the host (your machine) and the guest (Ubuntu). The app we’ll be testing is the Electron hello world app that is covered in another tutorial.
1. Installing ubuntu
The installation process took a lot of space so it’s been published in its own Install Ubuntu on VirtualBox tutorial.
2. Sharing electron project folder from host
This is one way to do it. You could also add the electron app to a git repo and push it from the host and pull it down to guest machine. The approach described below makes it possible for you to test the app on Linux before committing the changes to the repo.
Make sure you have installed the guest additions as explained in step 1.
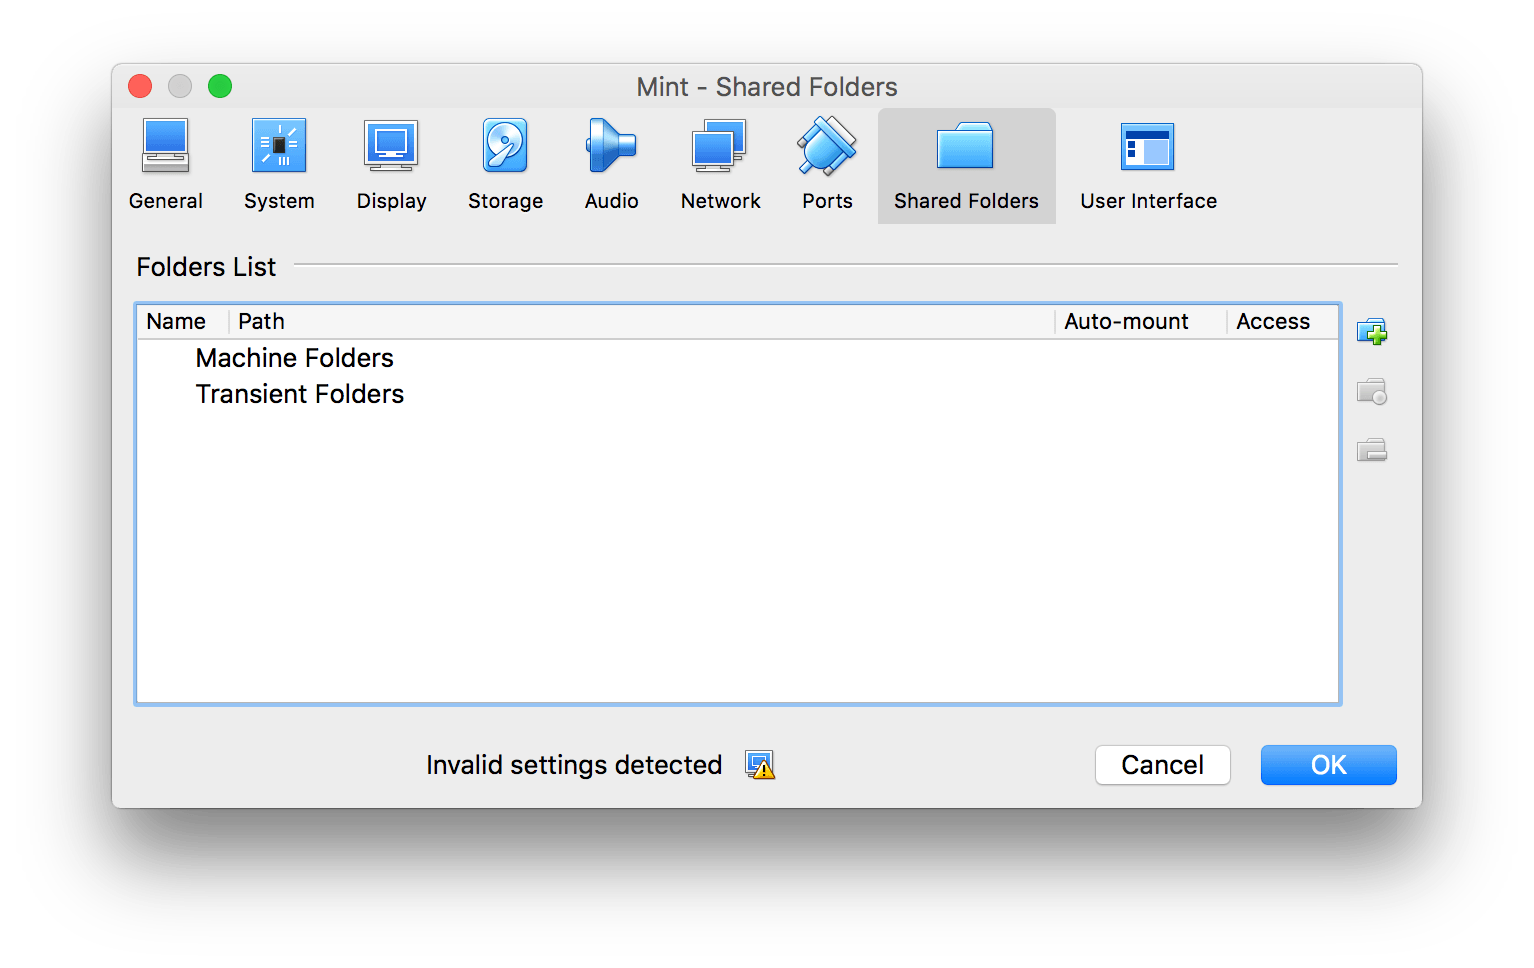
Click on the folder icon at the bottom of the virtual machine window and select Shared Folder Settings…
Shared folder settings - ubuntu
Then click on the green plus sign to the left. And set the Path to your electron project in Folder path. If you followed the Electron hello world the folder name will be called electron-hello-world
Shared Folders - VirtualBox add folder
Create an empty directory in your home folder of Ubuntu. We will use this to mount our share folder in. I called mine electron-hello-world and added it to my home folder with the terminal:
mkdir electron-hello-world
next it is time to mount the share:
sudo mount -t vboxsf electron-hello-world electron-hello-world/
3. Install node.js and electron
To install Node.js on Ubuntu, type this in the terminal:
How to install Ubuntu on a VirtualBox virtual machine. It’s very simple and won’t cost you a dime. Don’t forget to install the guest additions at the end.
Virtualbox
Virtualbox is a virtualization software that is free and open source. Start by downloading and installing it. It runs on Windows, MacOS, Linux distributions and Solaris.
Install virtualbox
Ubuntu
Ubuntu is a popular Linux distribution for desktops. It’s free and open source. So go ahead and download Ubuntu.
1. Creating a virtual machine in Virtualbox
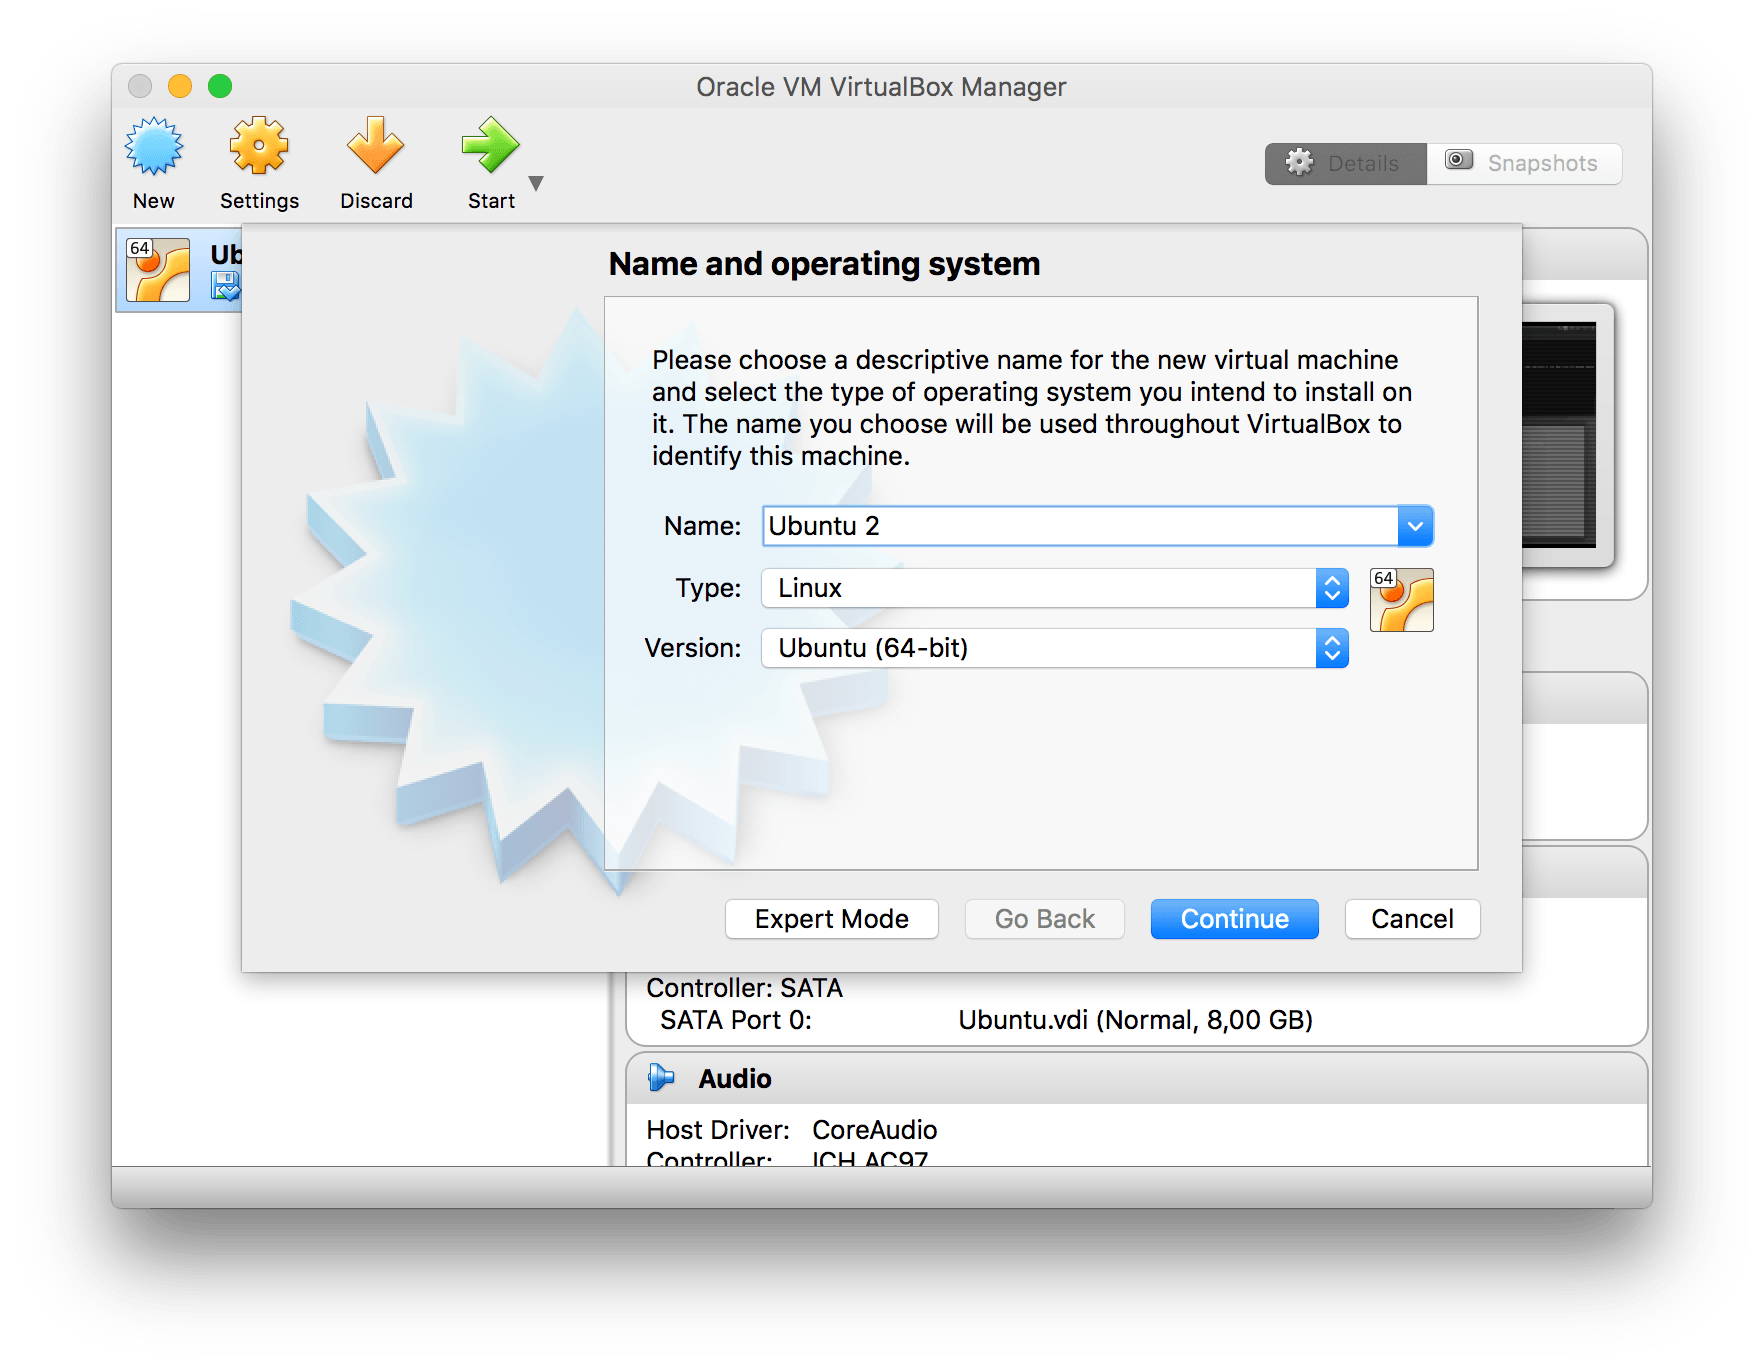
Fire up VirtualBox and click on the New button in the top left menu. When i started to type Ubuntu, VirtualBox automatically set type to linux and version to Ubuntu.
Name and operating system - VirtualBox
Next step is to set the amount of memory that will be allocated. VirtualBox will recommend you a number. But you can choose anything you’d like. This can be changed later if the virtual machine runs slow.
Memory size - VirtualBox
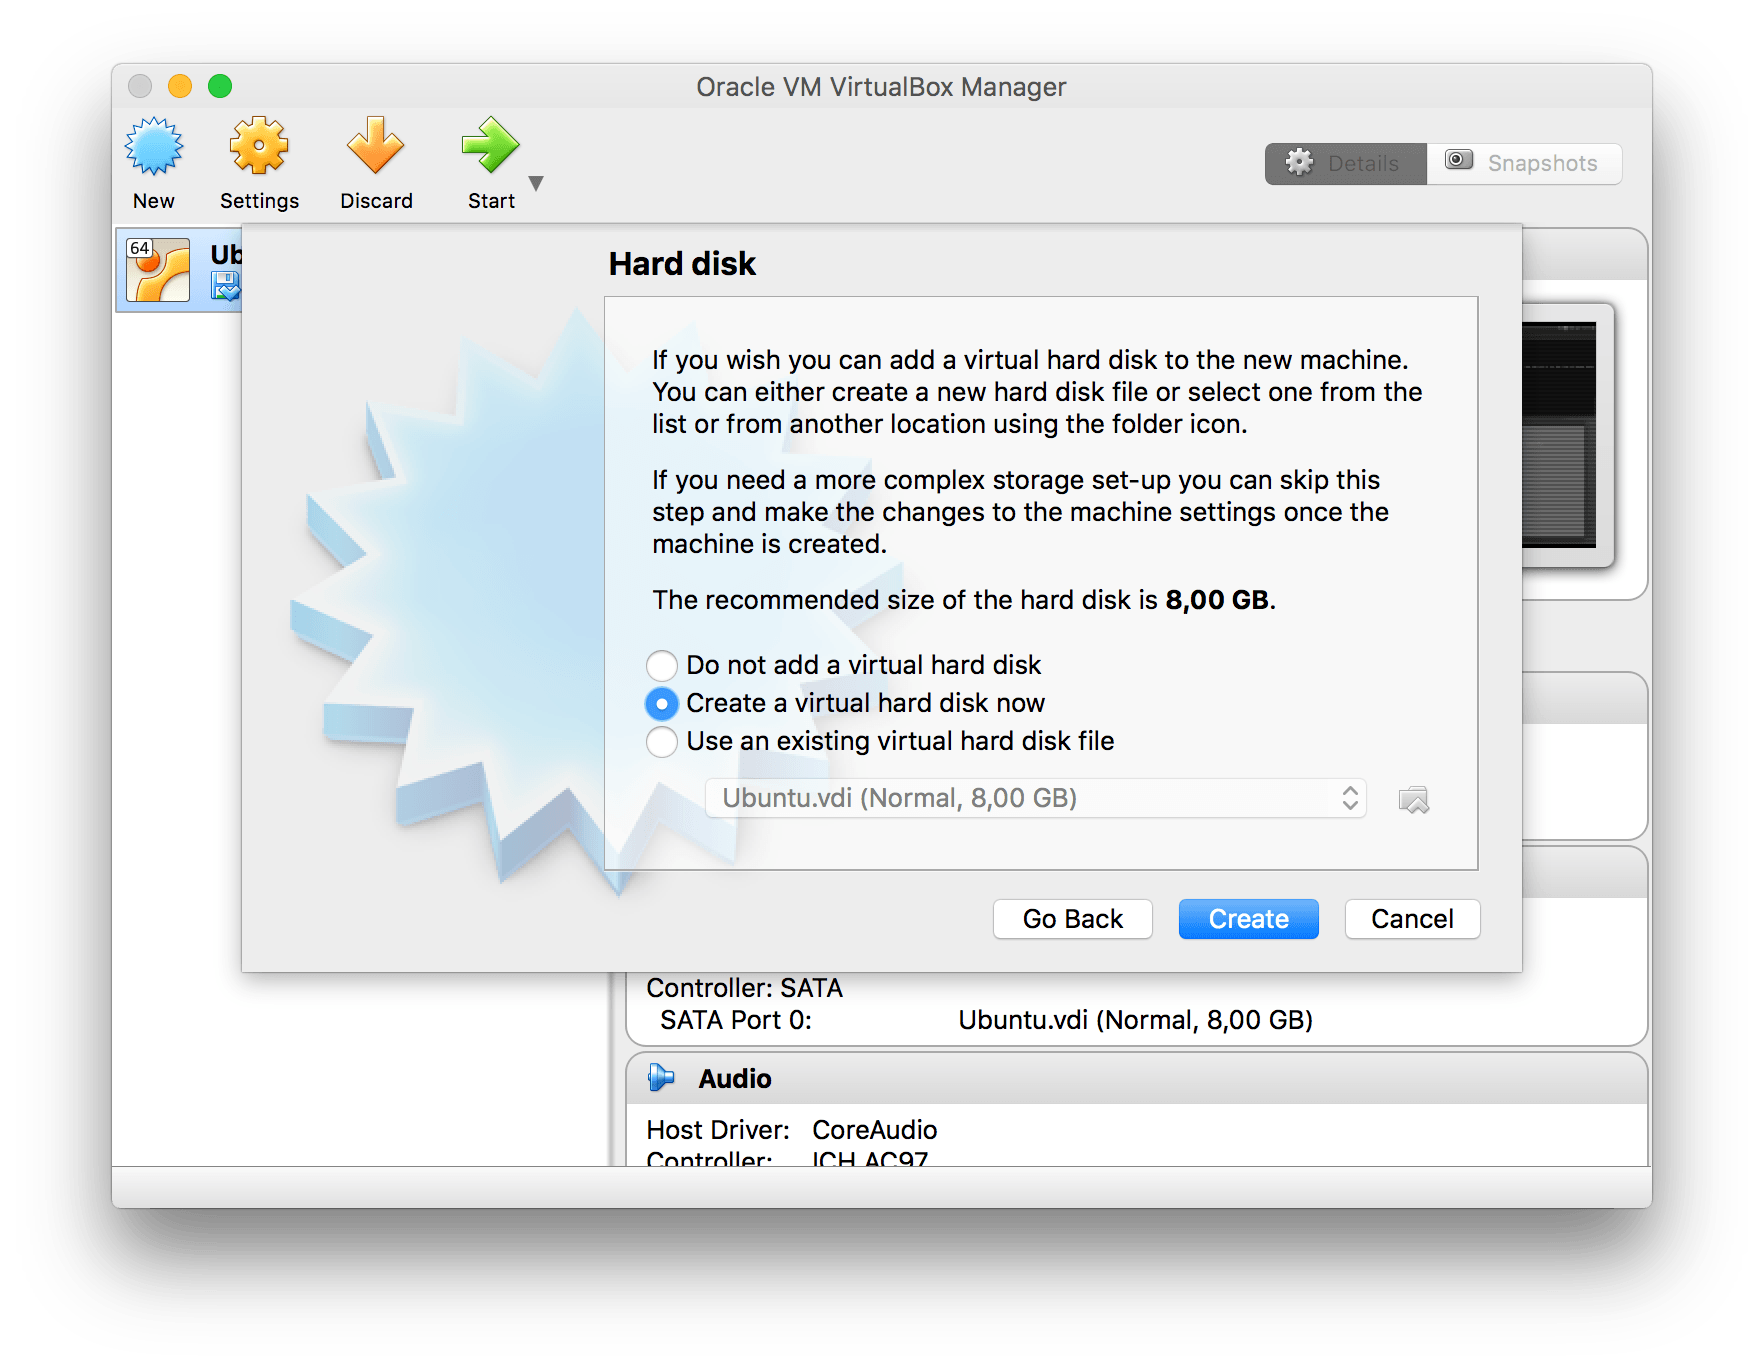
Next you select a size of the hard disk. 8 gb that VirtualBox recommends will work fine. Now click Create.
Harddisk size - VirtualBox
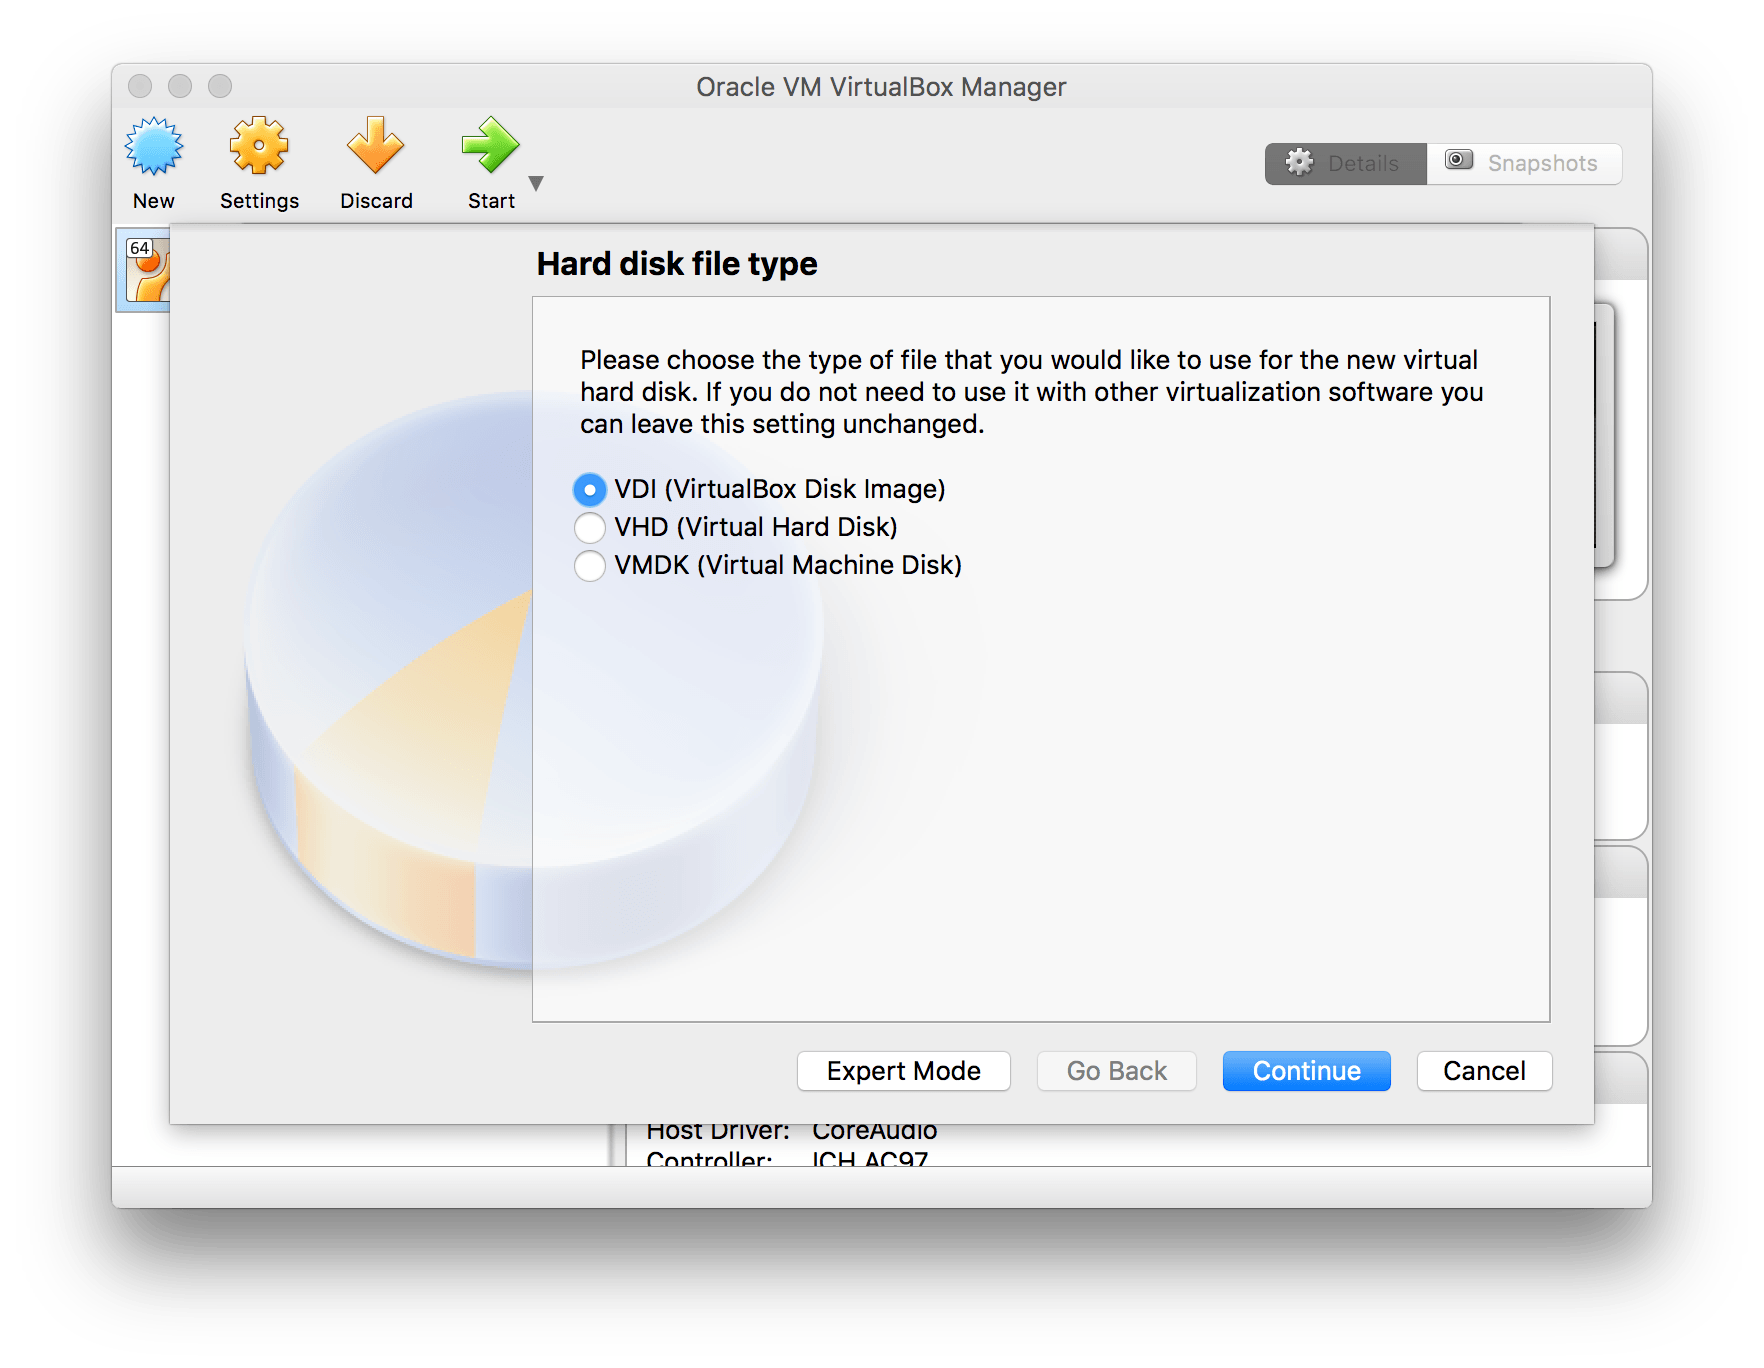
Select VDI as hard disk file type
Hard disk file type - VirtualBox
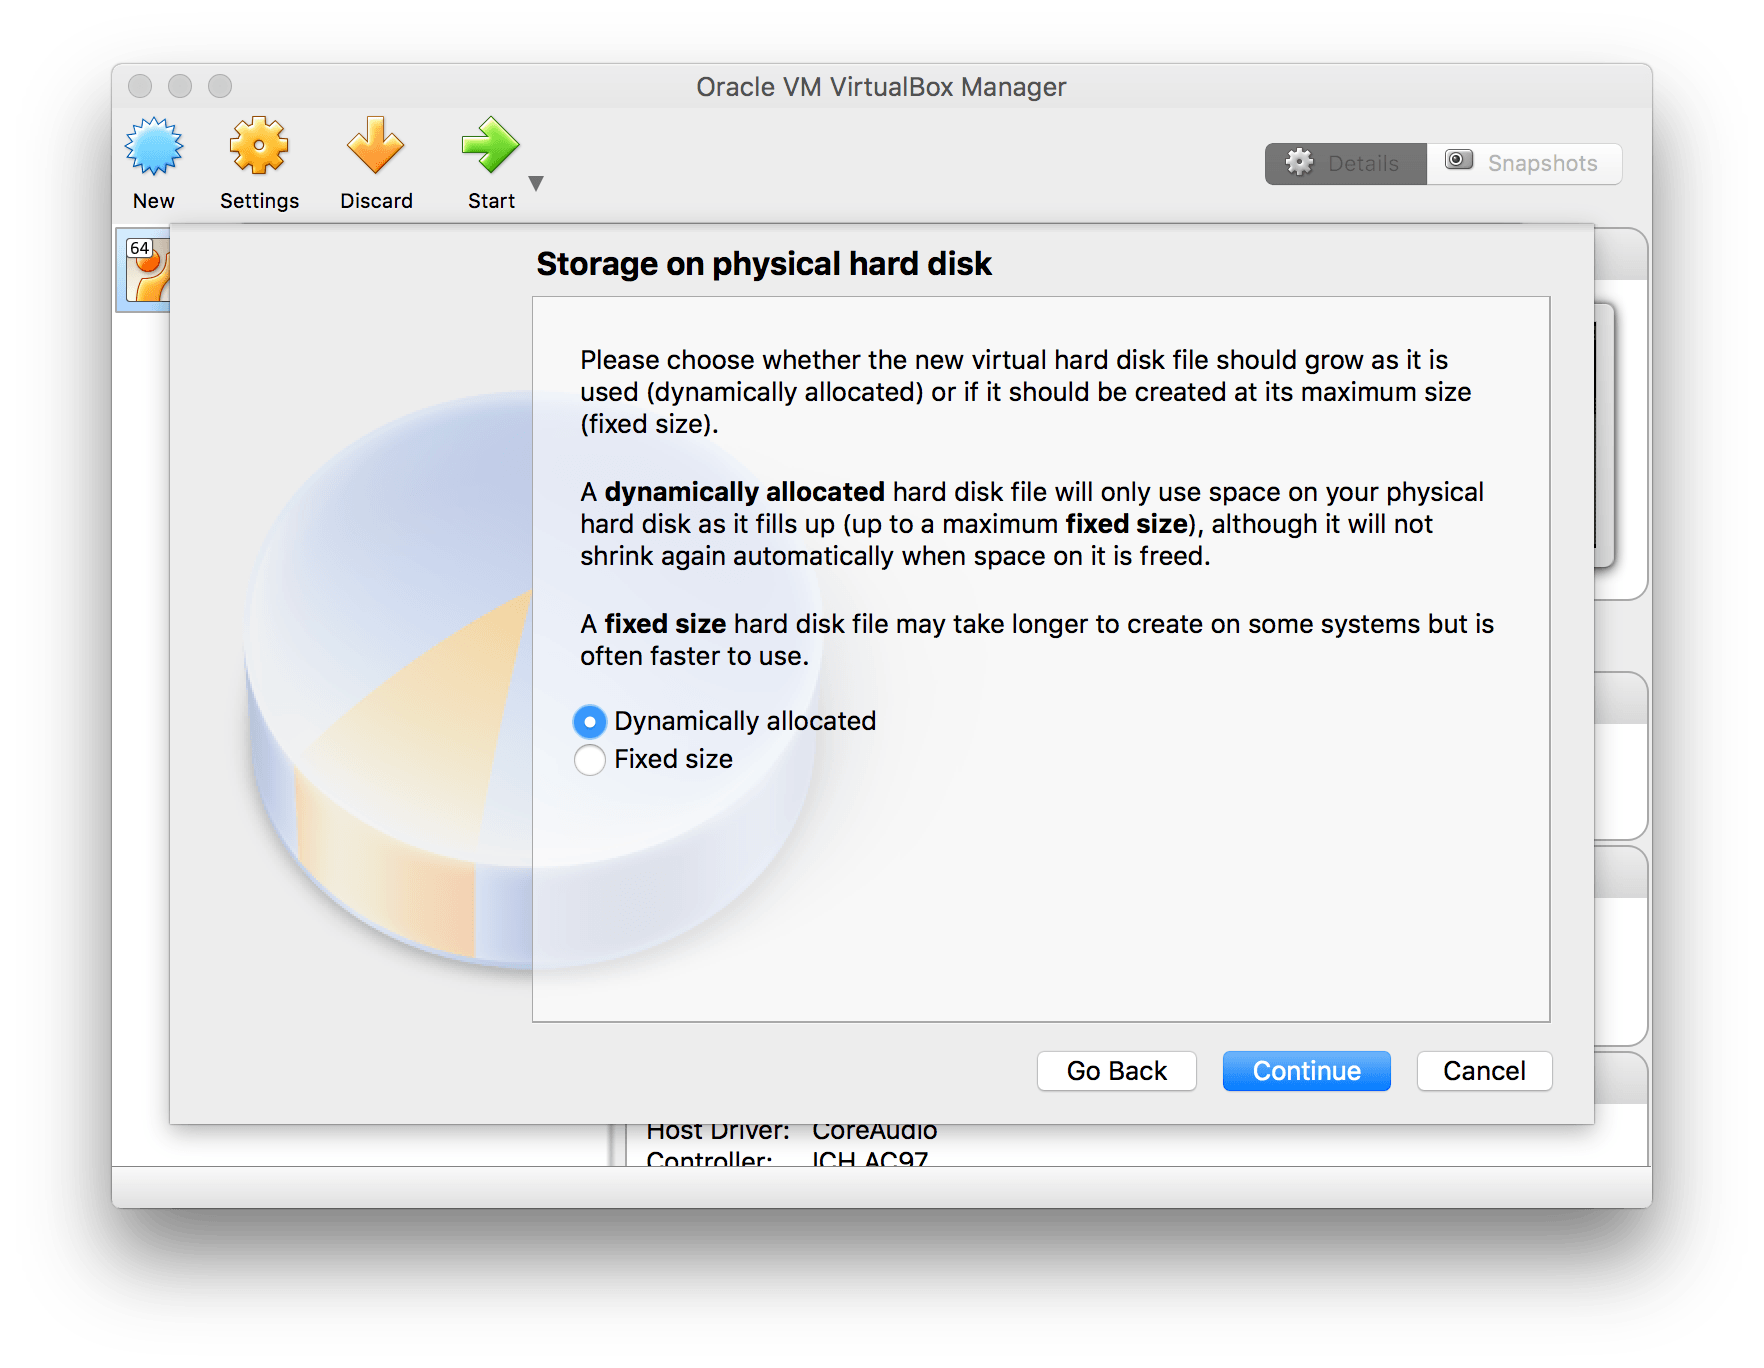
Next use dynamically allocated when asked.
Storage on physical hard disk - VirtualBox
Set the disk size to the standard 8GB
Ubuntu file location - VirtualBox
2. Installing Ubuntu on the new virtual machine
Now when the virtual machine is created it’s time to mount the Ubuntu ISO and install it.
Click on settings with the newly created virtual machine selected.
Settings - VirtualBox
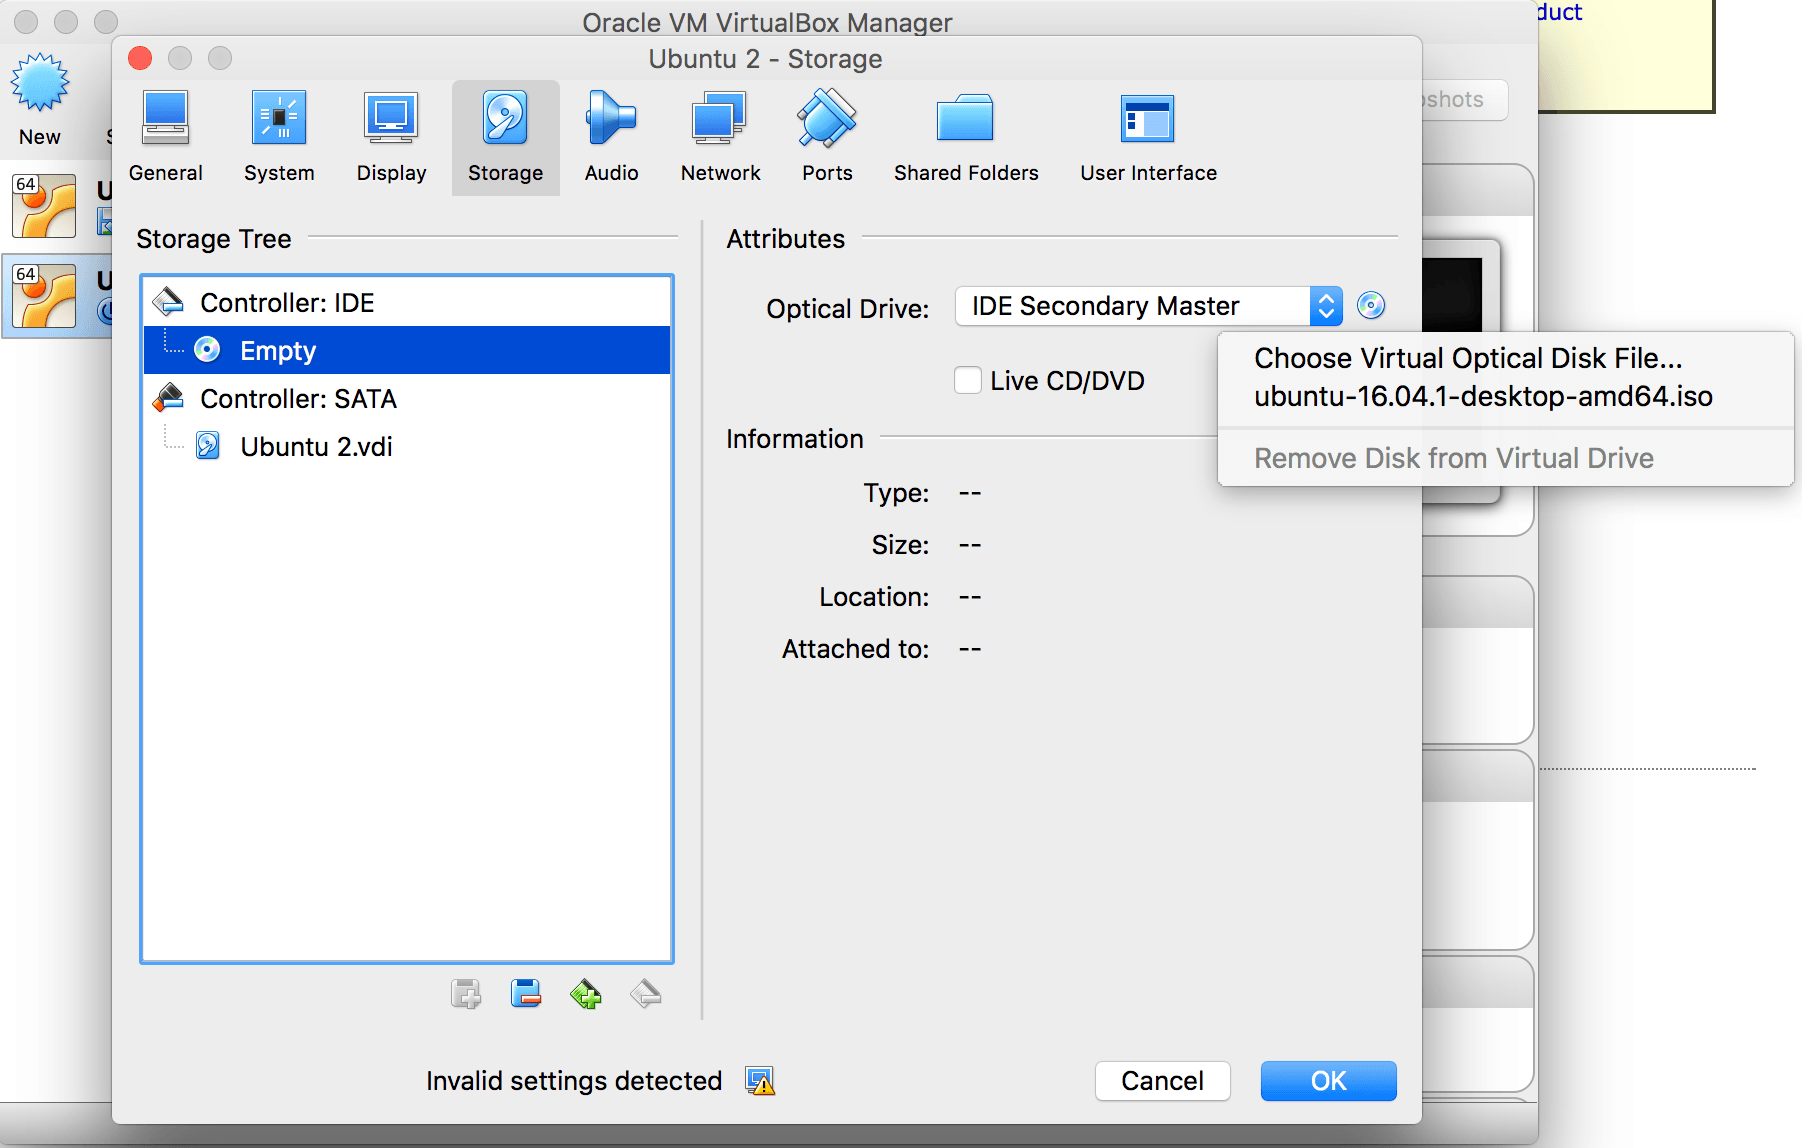
Now go to the storage pane and select the IDE controller, then click on the CD-icon to the right and click Choose Virtual Optical Disk File… and select the ubuntu ISO.
When you are done you can click on OK to go back to the main screen of VirtualBox.
Select iso - VirtualBox
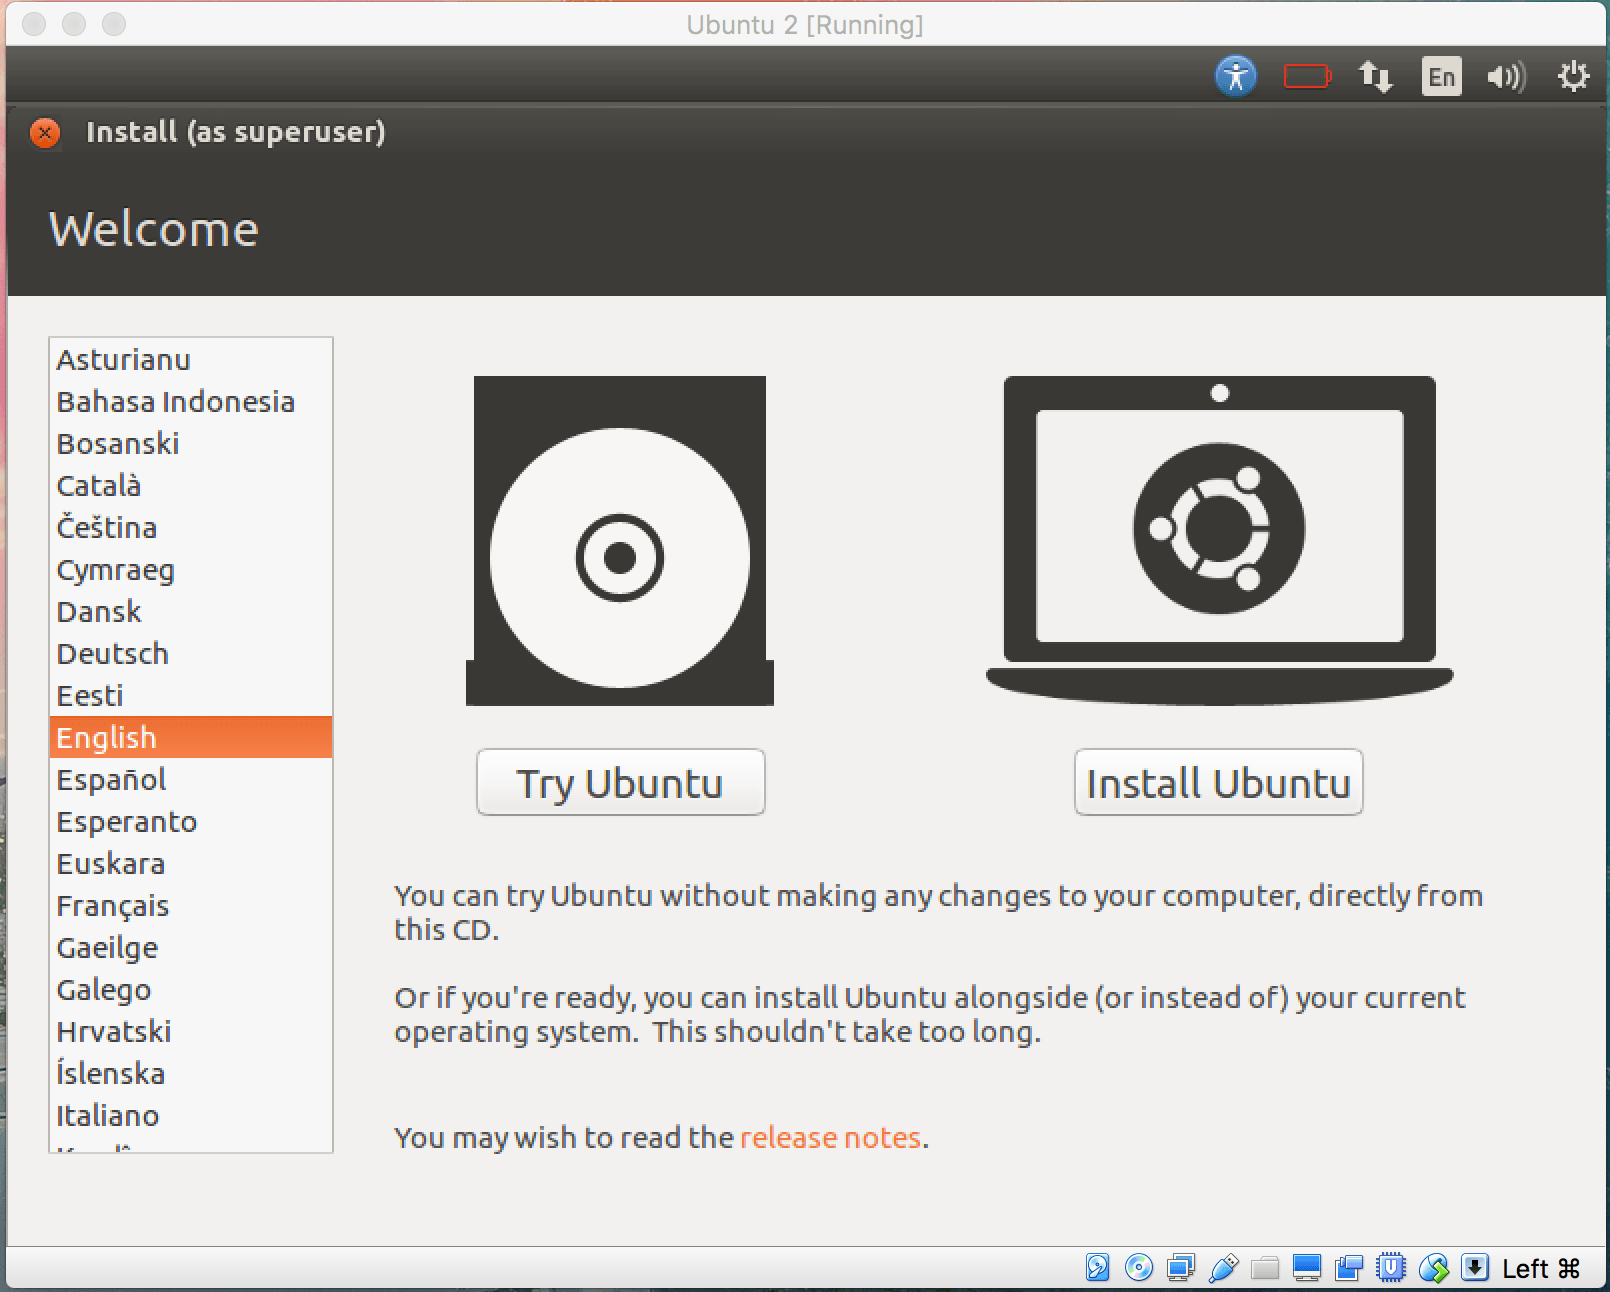
Now start the virtual machine and the ubuntu ISO will be booting up to something like this:
Install Ubuntu - VirtualBox
Now you click on… wait for it…. Install Ubuntu. I’m not going to guide you through this install. For 99%(this number was picked out of the blue) of you it’s only to click on continue until it’s installed.
When the installation is done Ubuntu will be asked to be restarted. Click on that button. Then when the message “please remove installation medium” is displayed, VirtualBox has already unmounted the ISO, so you can hit ENTER directly.
Ubuntu installation is done!
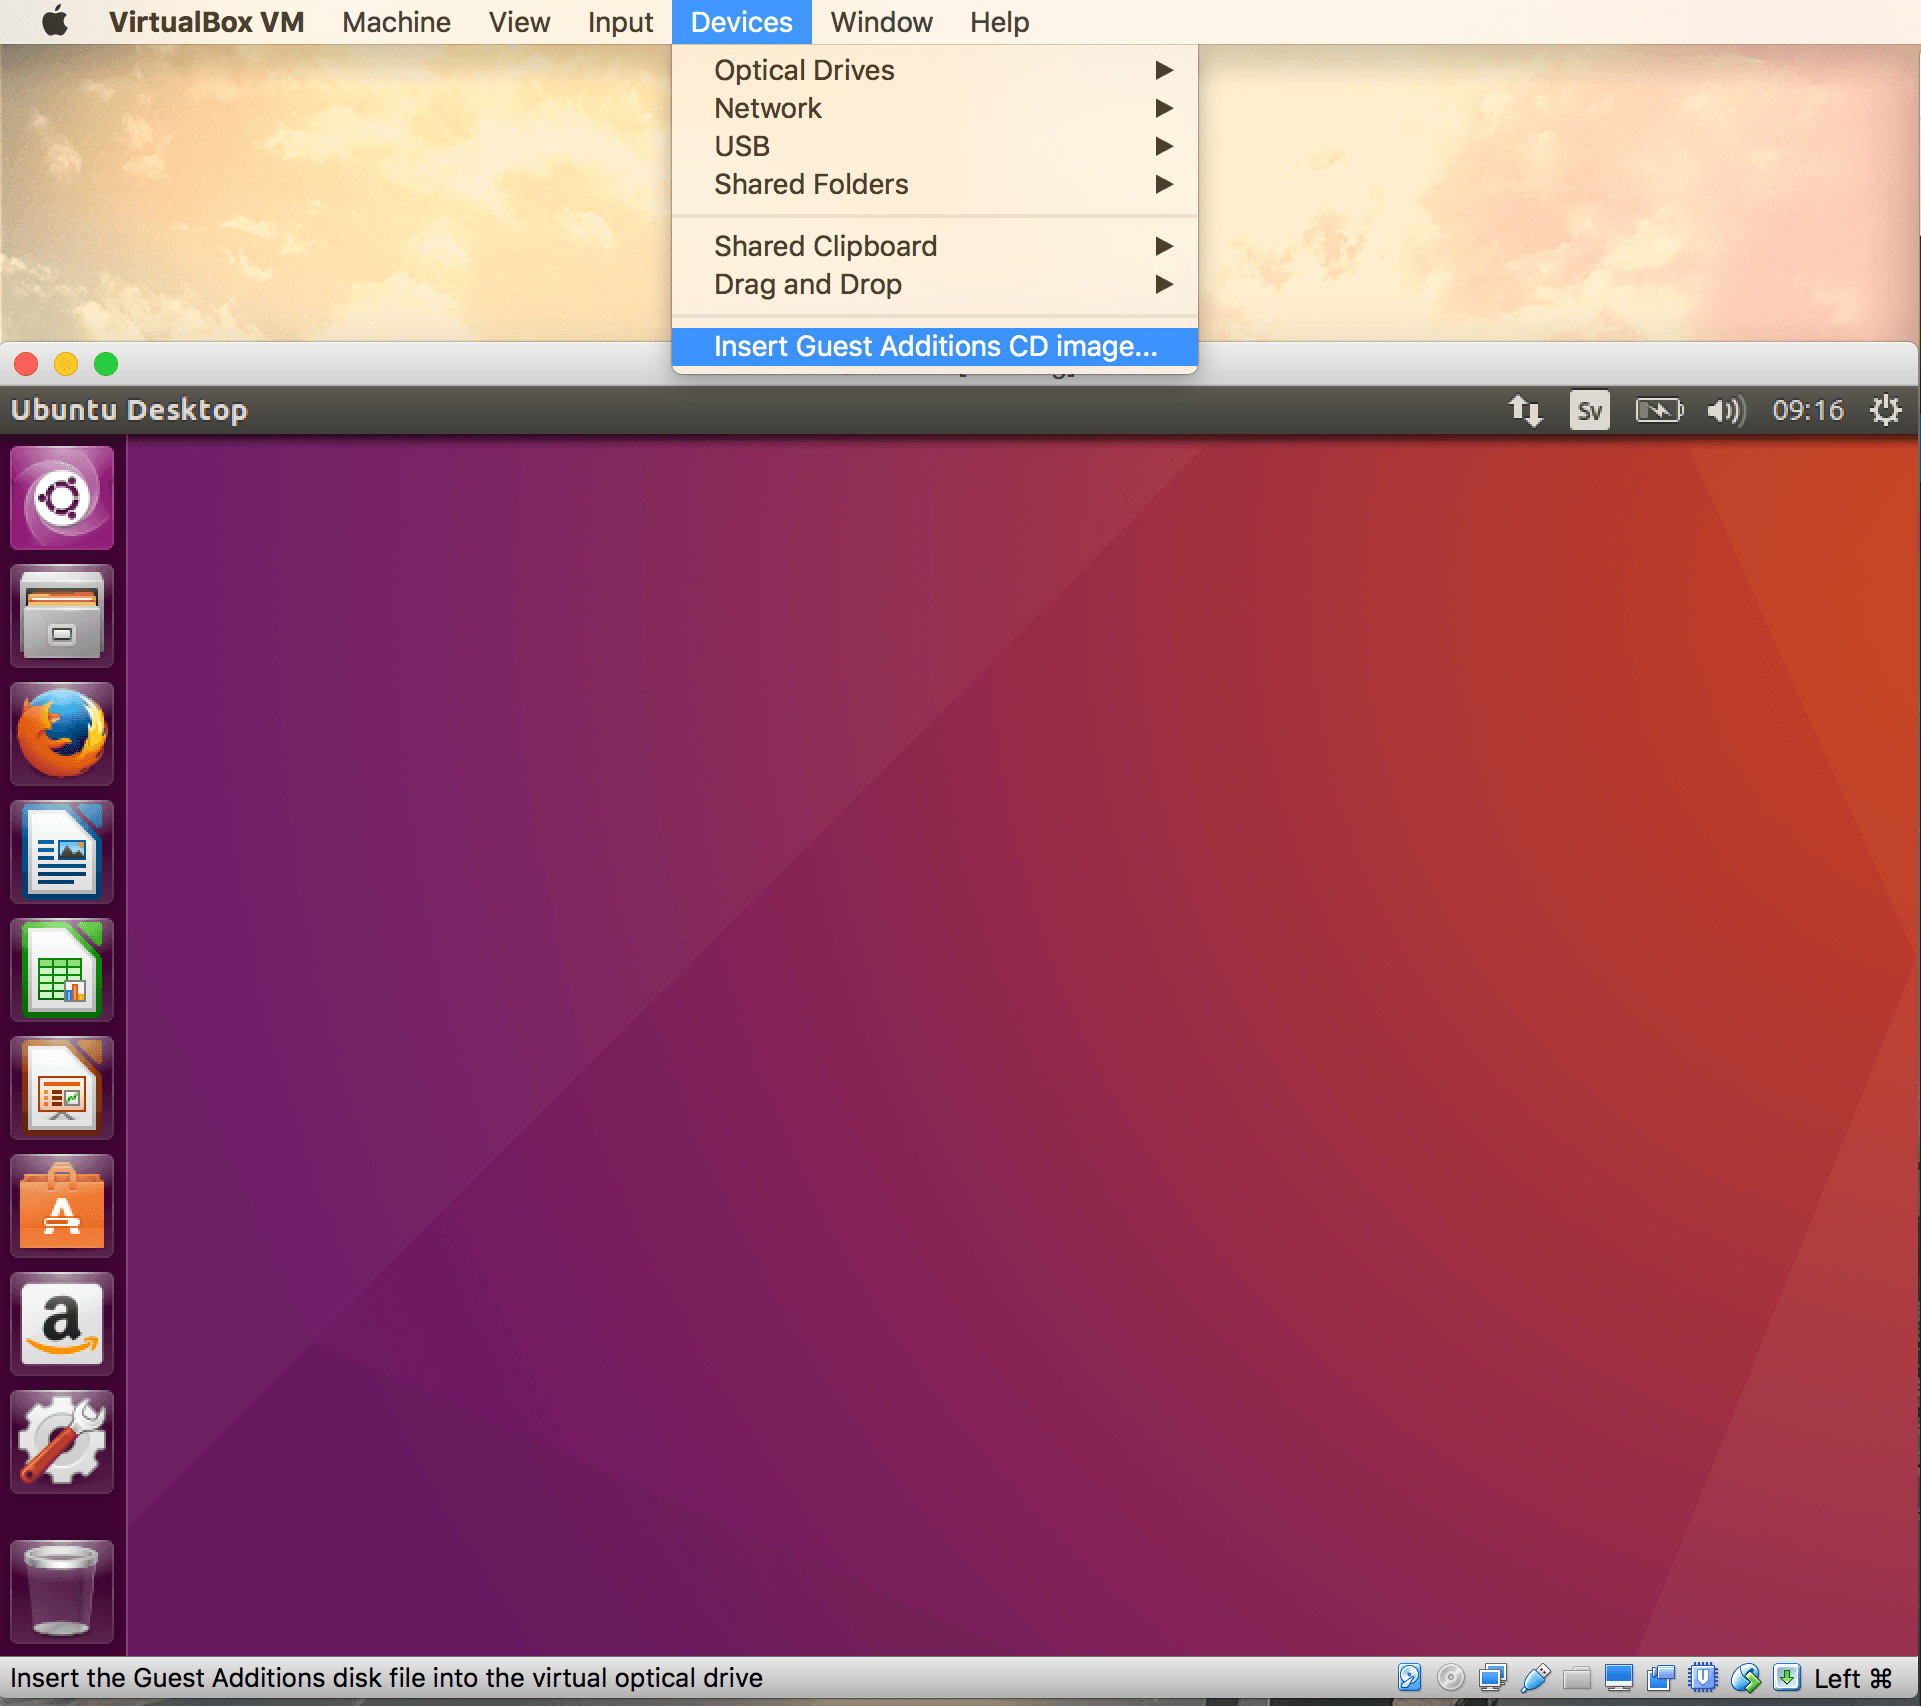
3. Installing VirtualBox guest additions
To share folders between the host and the guest machine we will need to install the guest additions.
Go to Devices in the VirtualBox menu and click on Insert guest additions CD image.
Click on run when Ubuntu asks you if you want to install the software.
Thought i’d make a simple Electron hello world tutorial application. Electron is a framework for building desktop apps with CSS, Javascript and HTML. The apps will be cross platform and work on Windows, MacOS and Linux distributions.
You can download this application from Github if you’d like. After this blog post was written i decided to rebrand it to the electron tutorial app because that name suits it better when adding more electron tutorials to it.
An electron app is built using the node.js framework and is brought to us by Github. Maybe you’ve already tested a few electron apps now. For example slack is a well know application built on electron. If you’d like to test one i can recommend Atom. In fact, why don’t you try this tutorial with that IDE?
Video introduction
1. Installing Node.js
First we need to install node.js. So go ahead and do that.
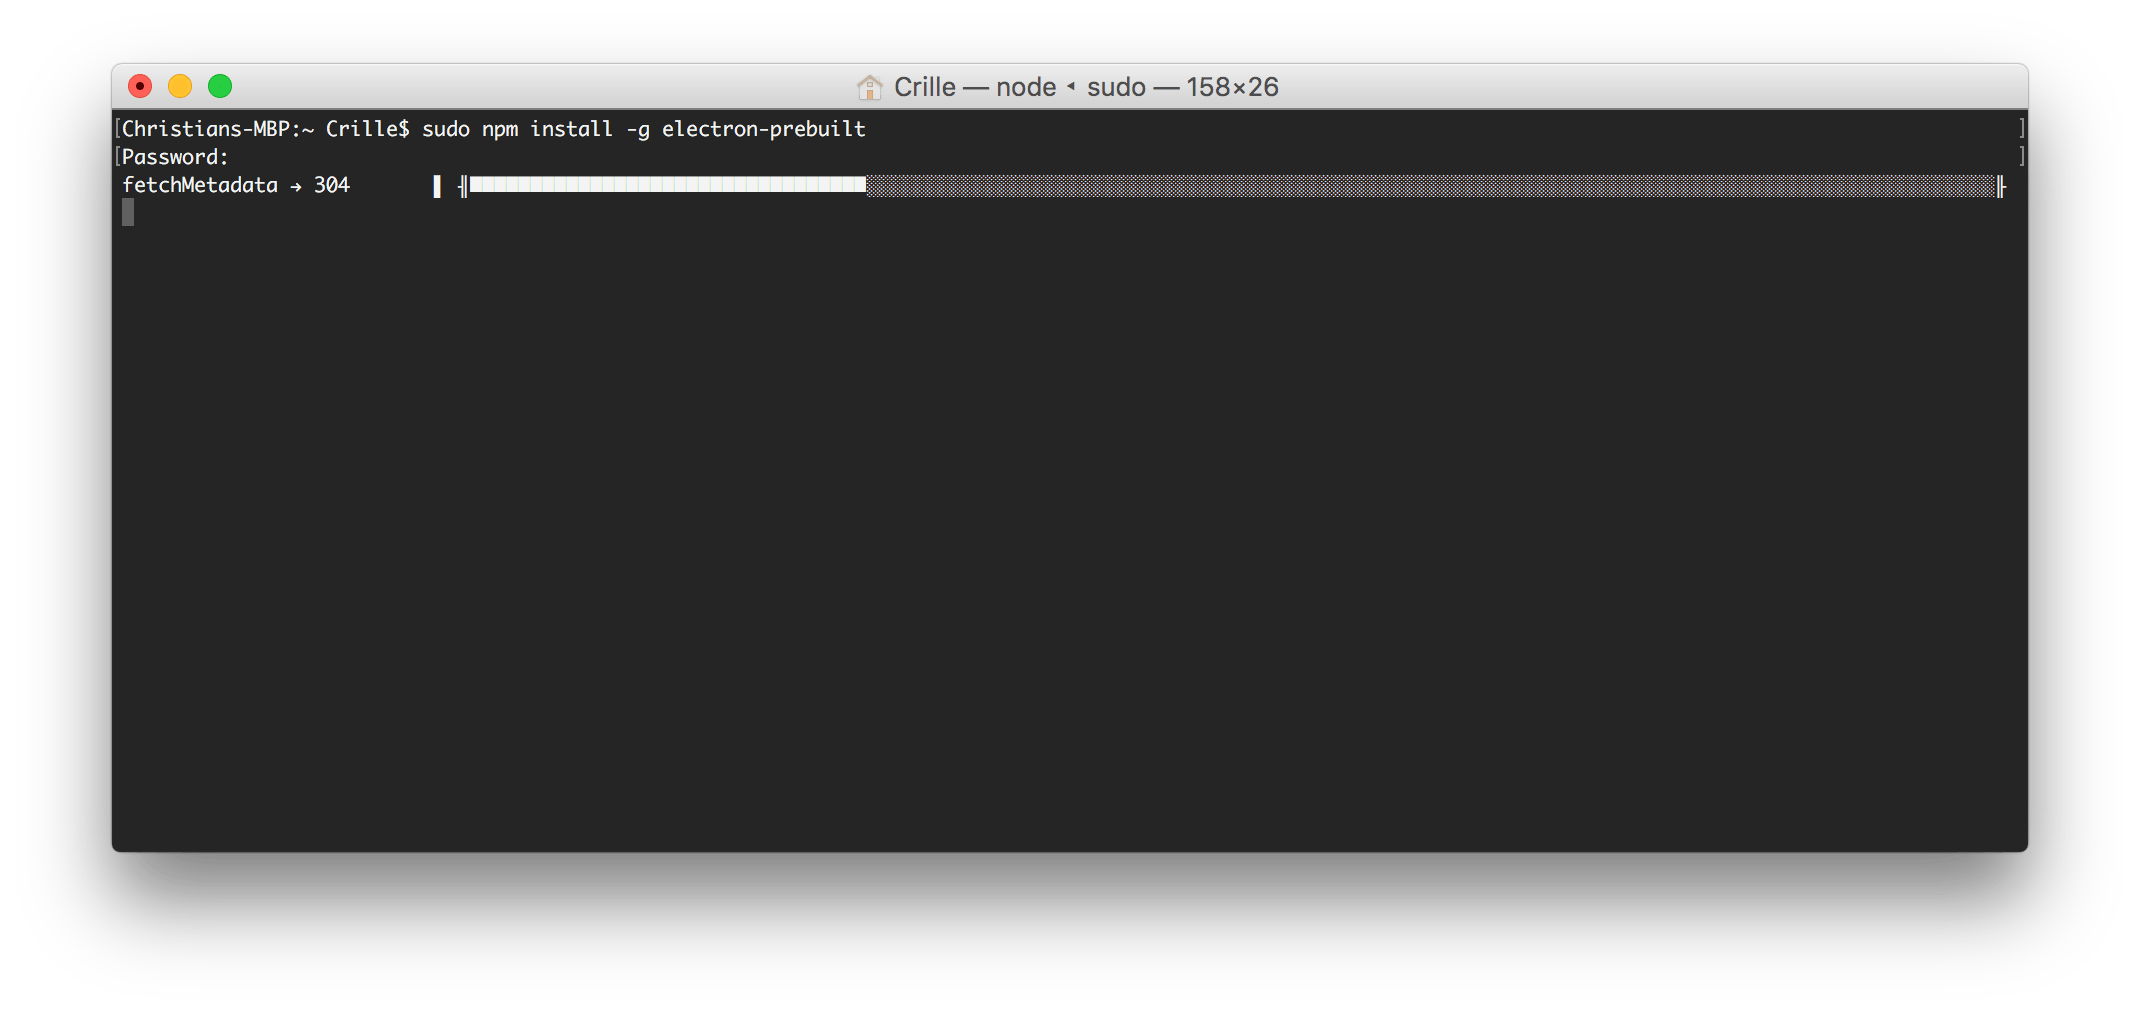
2. Installing electron prebuilt
Now that we have Node.js installed, let’s install electron prebuilt globally.
sudo npm install-g electron
Install electron
This makes us able to test run our electron application by running this command in our terminal. But more on this later.
electron .
2. File structure
In its most basic form an electron app needs three files. package.json, main.js, and index.html. Making the folder structure look like this:
electron-hello-world/
index.html
main.js
package.json
Create a folder and add those files and let’s walk trough them one by one.
3. package.json
Let’s add content to package.json. We need a name, a version and a main setting that points to a script that will handle the starting up of the app. If main is not present electron will look for a file called index.js.
As mentioned above the we pointed out main.js to handle the startup of our application. Lets add this content to it. This code is borrowed from electron quick start.
constelectron=require('electron')// Module to control application life.constapp=electron.app// Module to create native browser window.constBrowserWindow=electron.BrowserWindow// Keep a global reference of the window object, if you don't, the window will// be closed automatically when the JavaScript object is garbage collected.letmainWindowfunctioncreateWindow(){// Create the browser window.mainWindow=newBrowserWindow({width:800,height:600})// and load the index.html of the app.mainWindow.loadURL(`file://${__dirname}/index.html`)// Open the DevTools.mainWindow.webContents.openDevTools()// Emitted when the window is closed.mainWindow.on('closed',function(){// Dereference the window object, usually you would store windows// in an array if your app supports multi windows, this is the time// when you should delete the corresponding element.mainWindow=null})}// This method will be called when Electron has finished// initialization and is ready to create browser windows.// Some APIs can only be used after this event occurs.app.on('ready',createWindow)// Quit when all windows are closed.app.on('window-all-closed',function(){// On OS X it is common for applications and their menu bar// to stay active until the user quits explicitly with Cmd + Qif(process.platform!=='darwin'){app.quit()}})app.on('activate',function(){// On OS X it's common to re-create a window in the app when the// dock icon is clicked and there are no other windows open.if(mainWindow===null){createWindow()}})// In this file you can include the rest of your app's specific main process// code. You can also put them in separate files and require them here.
5. index.html
The index.html takes care of the gui.
<!DOCTYPE html><html><head><metacharset="UTF-8"><title>Electron Hello World!</title></head><body><h1>Electron Hello World!</h1>
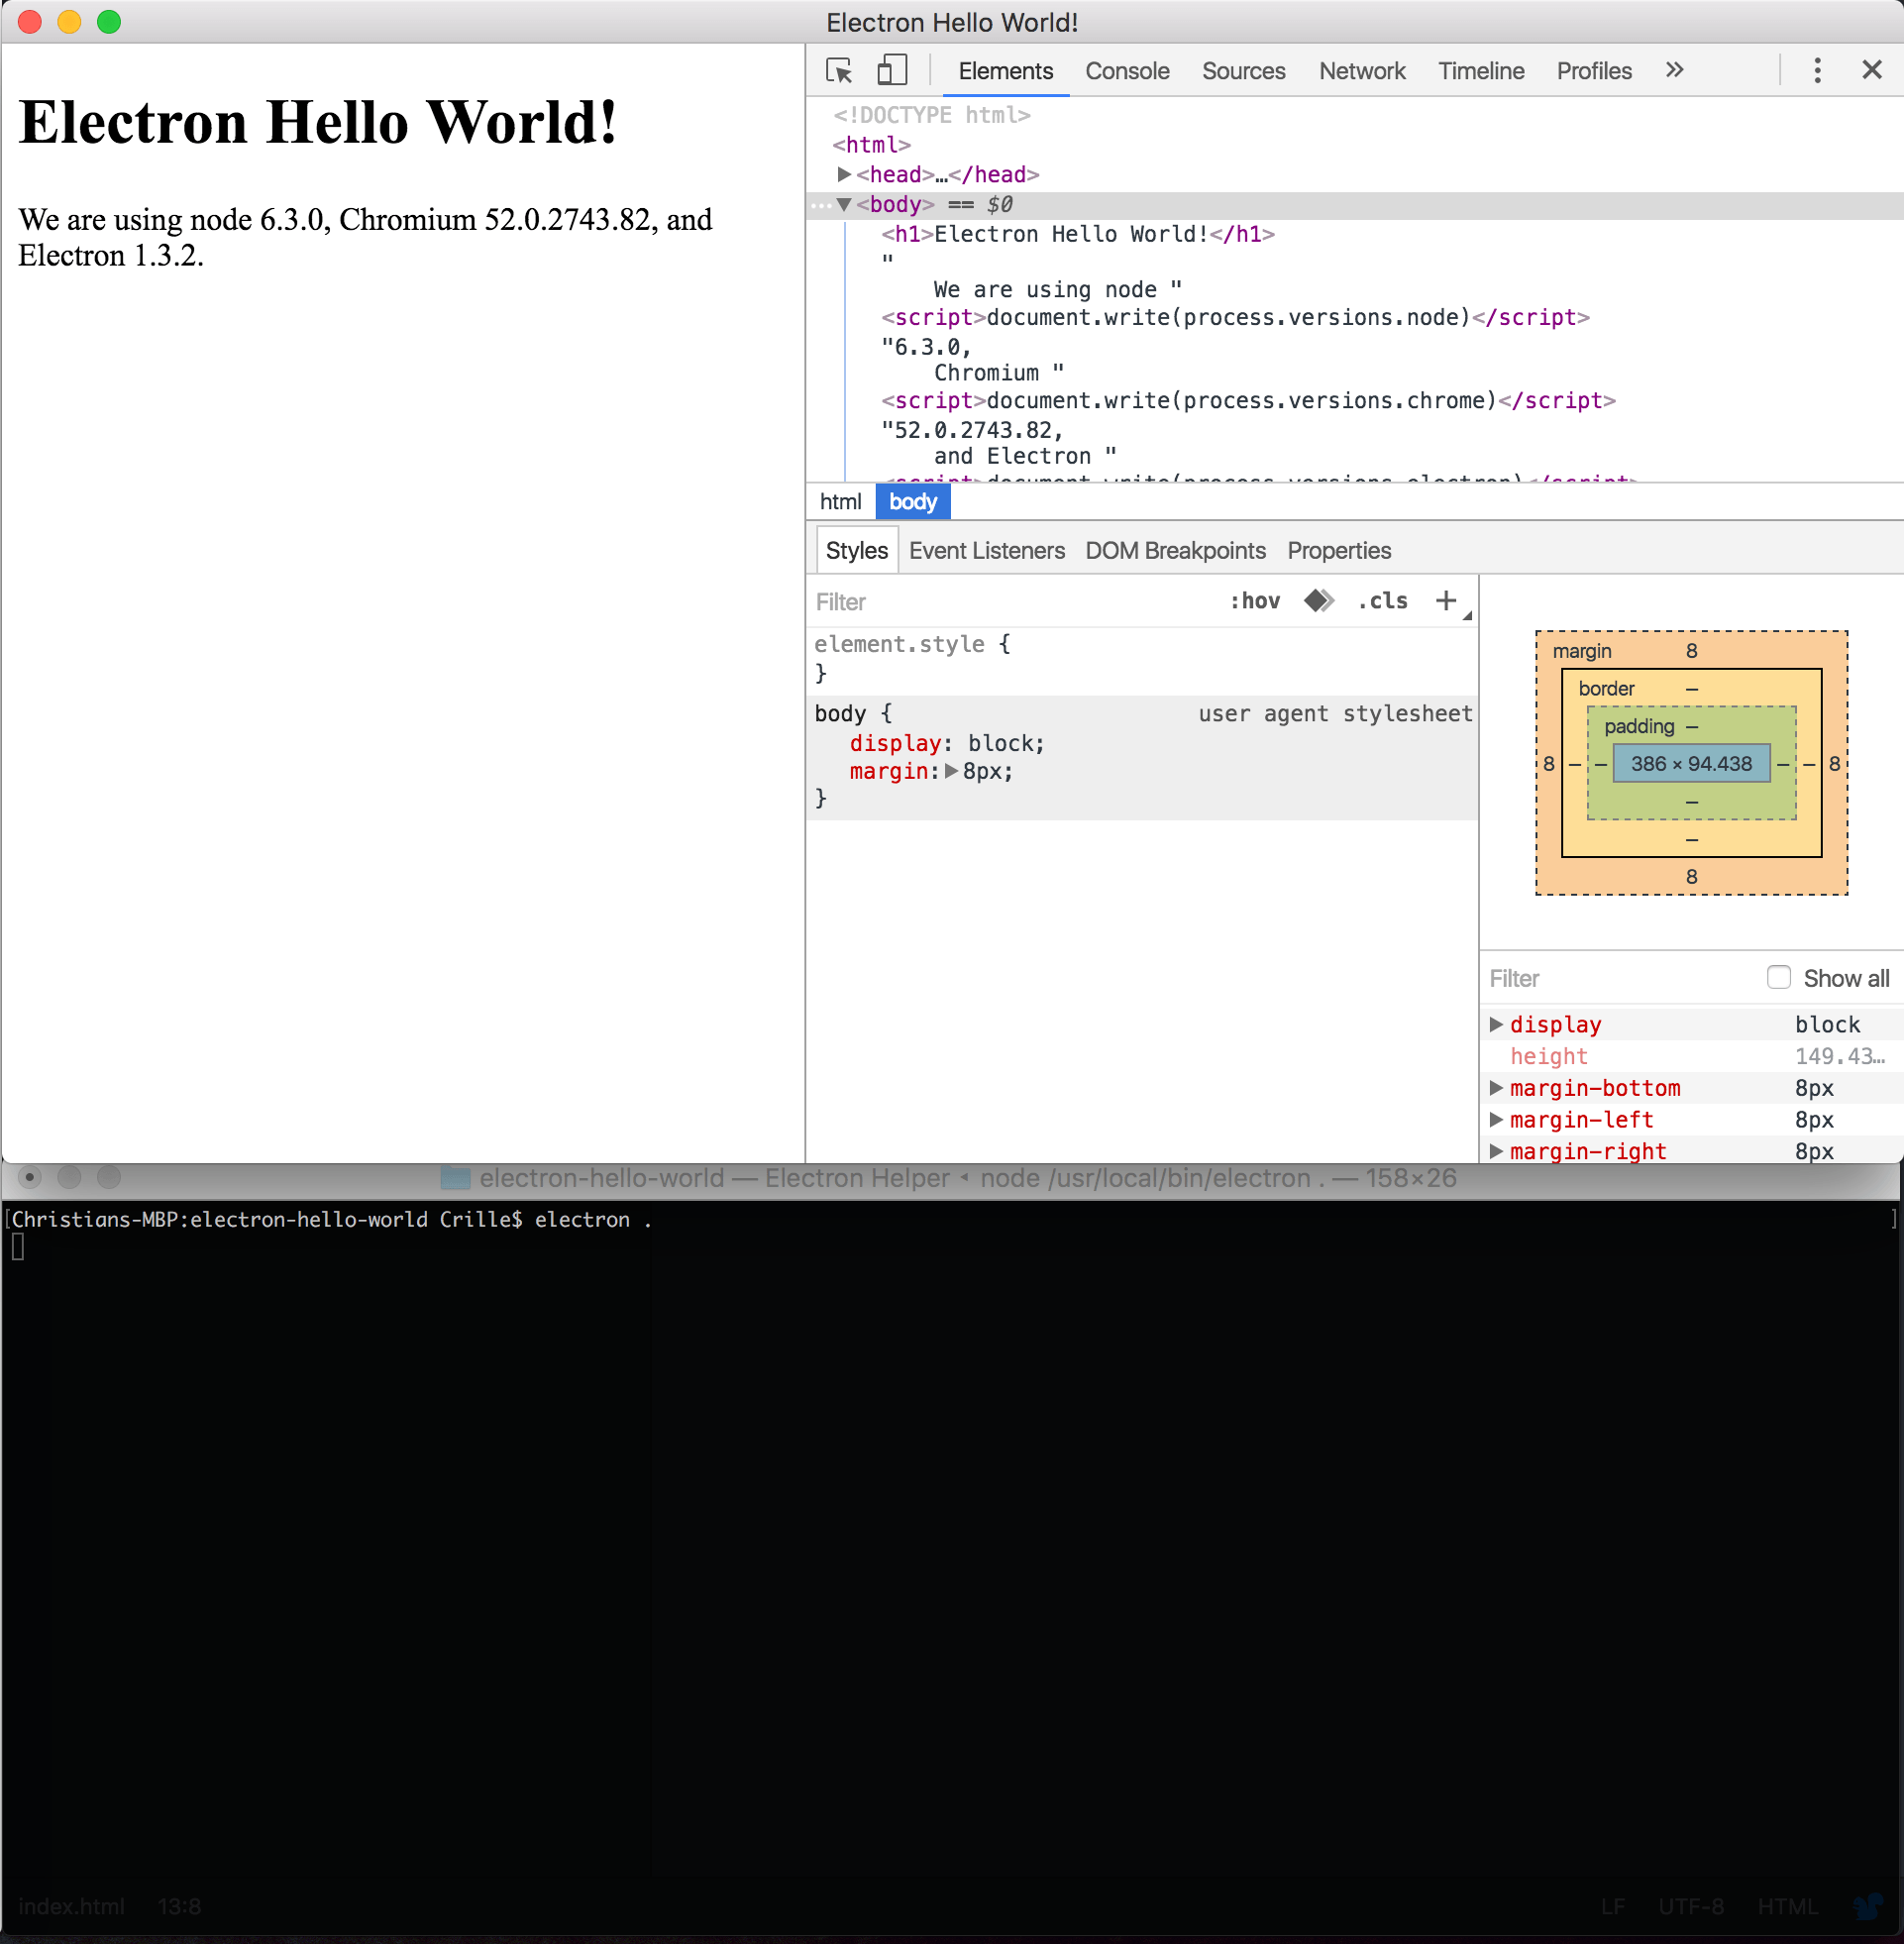
We are using node <script>document.write(process.versions.node)</script>,
Chromium <script>document.write(process.versions.chrome)</script>,
and Electron <script>document.write(process.versions.electron)</script>.
</body></html>
6. Running the Electron hello world app
Now let’s get back to the electron . command. That will start electron and run the app that we are currently building.
electron .
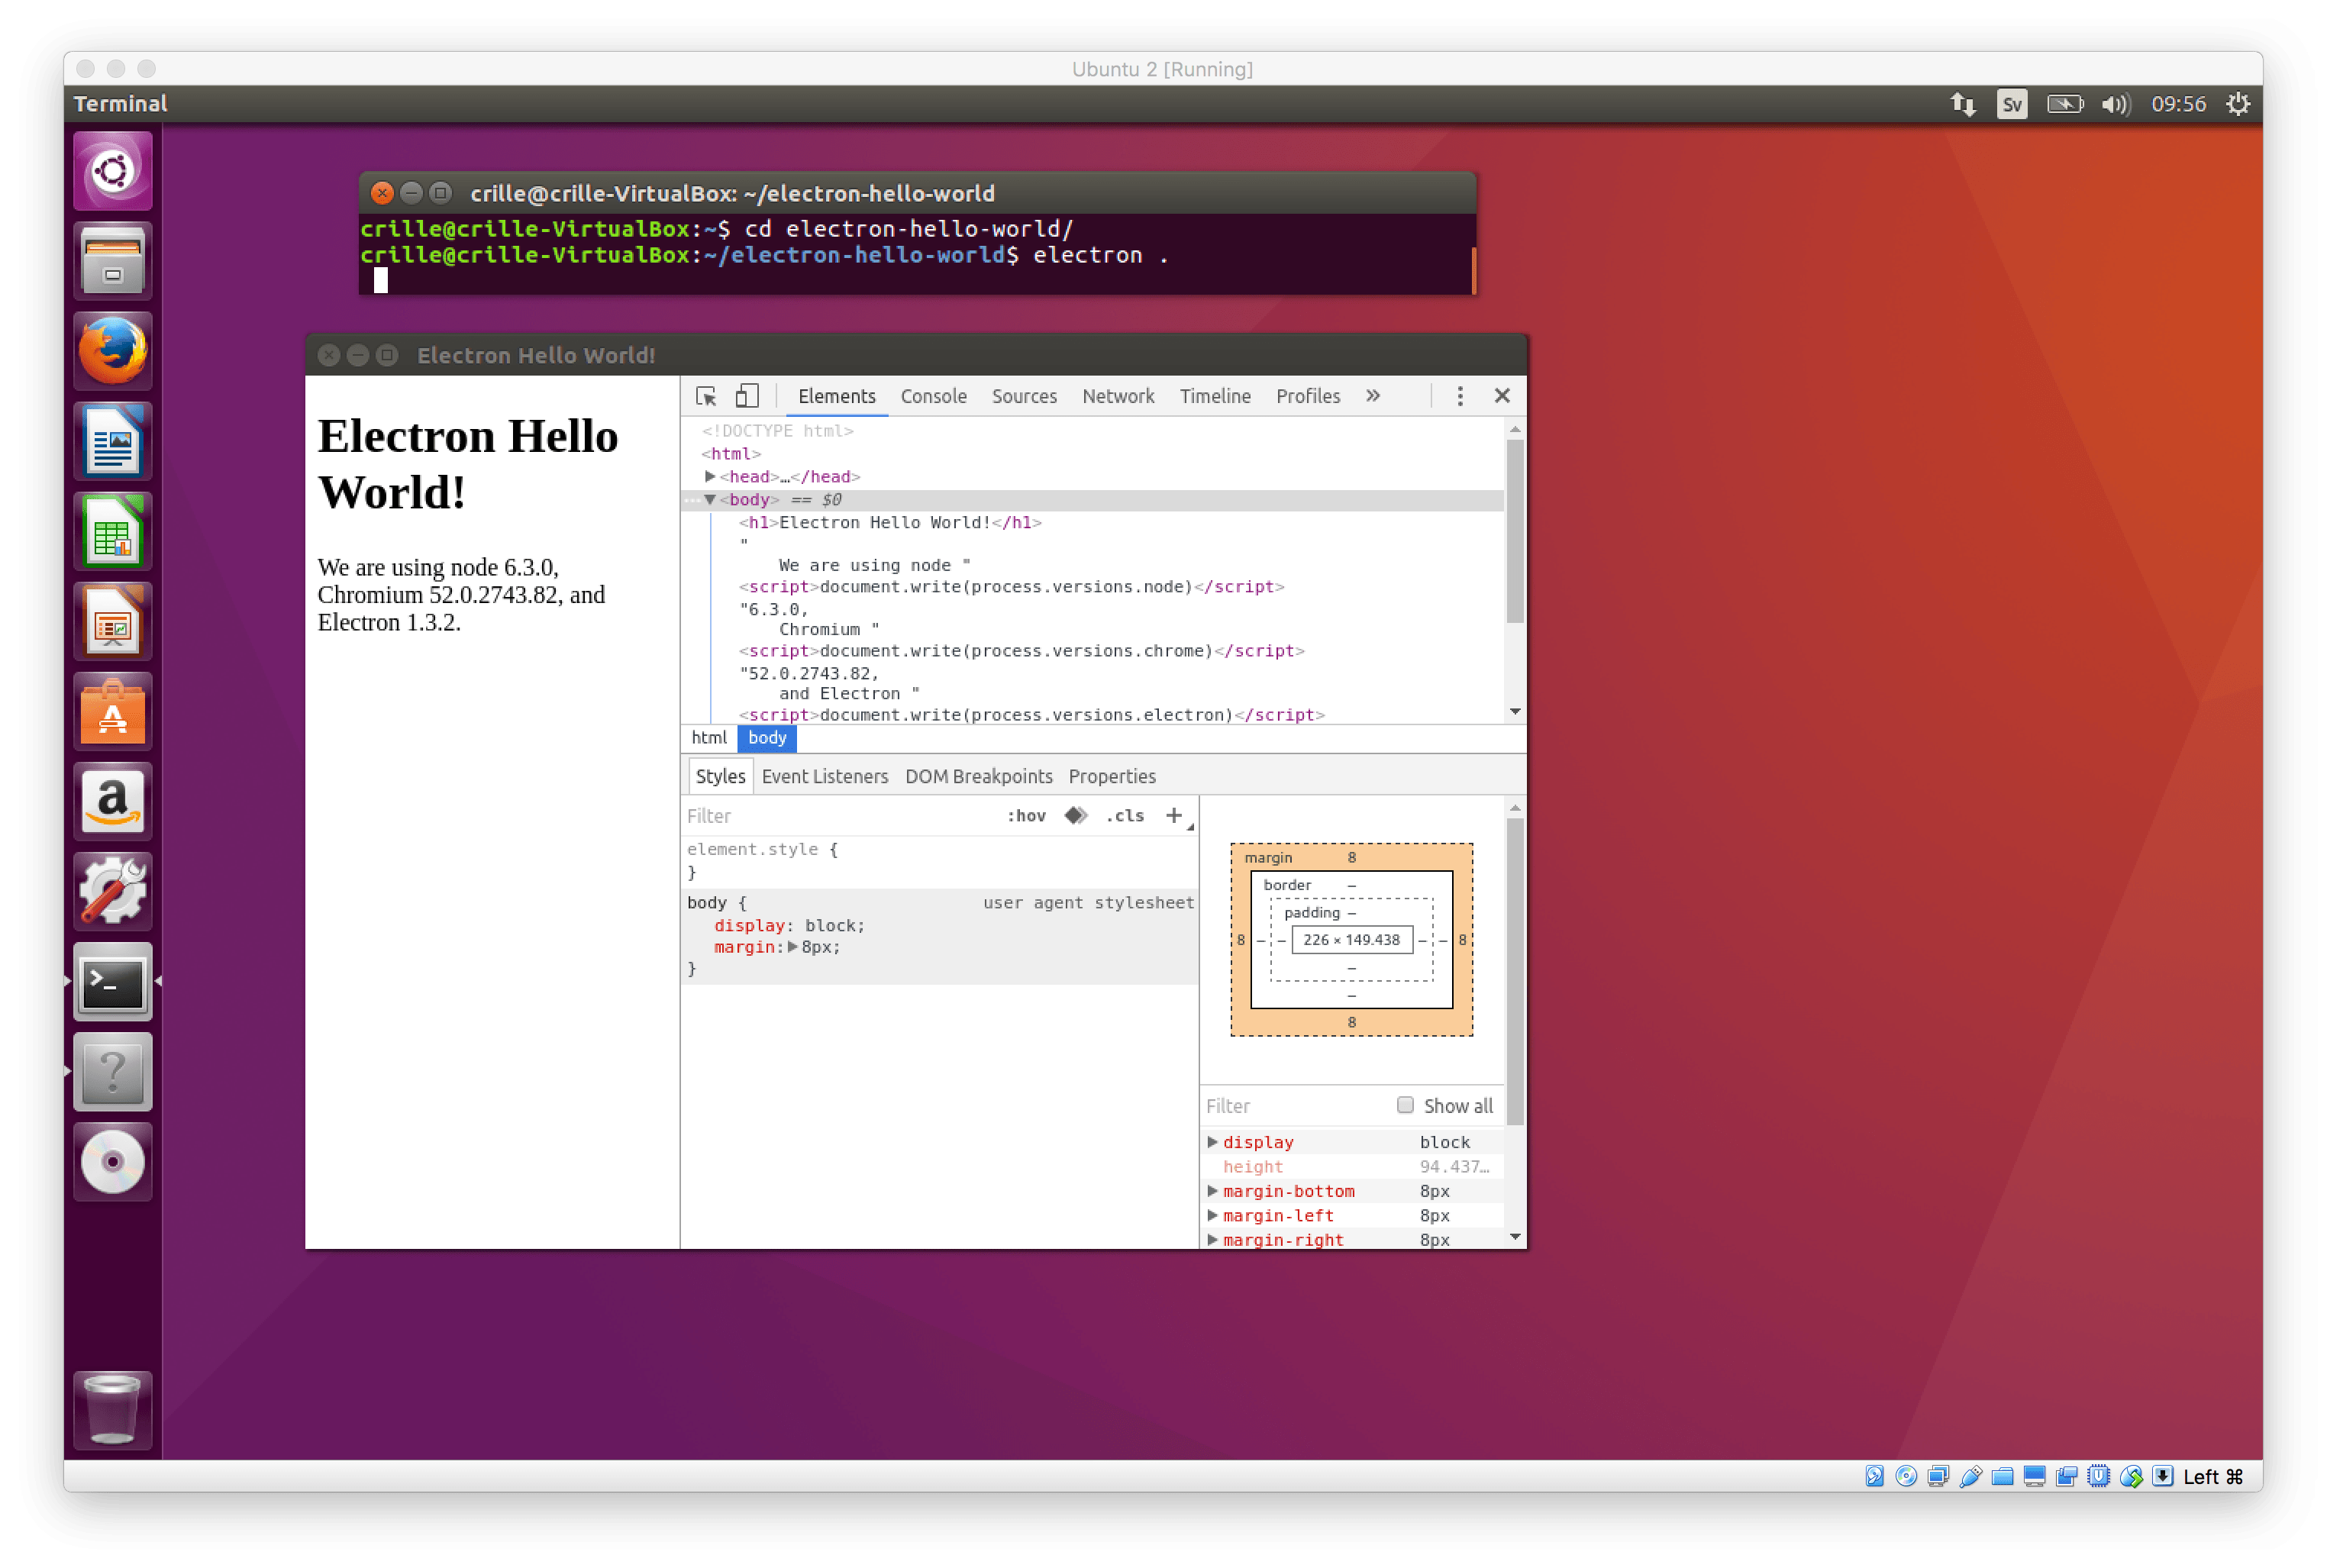
This fires up an app looking like this:
electron hello world running
As you can see we also have the chromium developer tool window opened inside our app. This is opened with this call in main.js.
Record audio with Soundflower on Mac. It’s free and open source. I use this as an alternative to Loopback, which is great but has a limitation to record only 20 minutes in the free version. But you can also buy it but it was to expensive in my opinion. To record audio we also use Quicktime player in this tutorial.
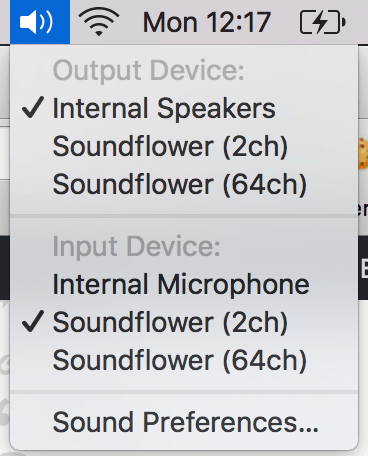
If you alt click on the sound icon you can see 4 new devices has been added for us to use.
Soundflower - menu
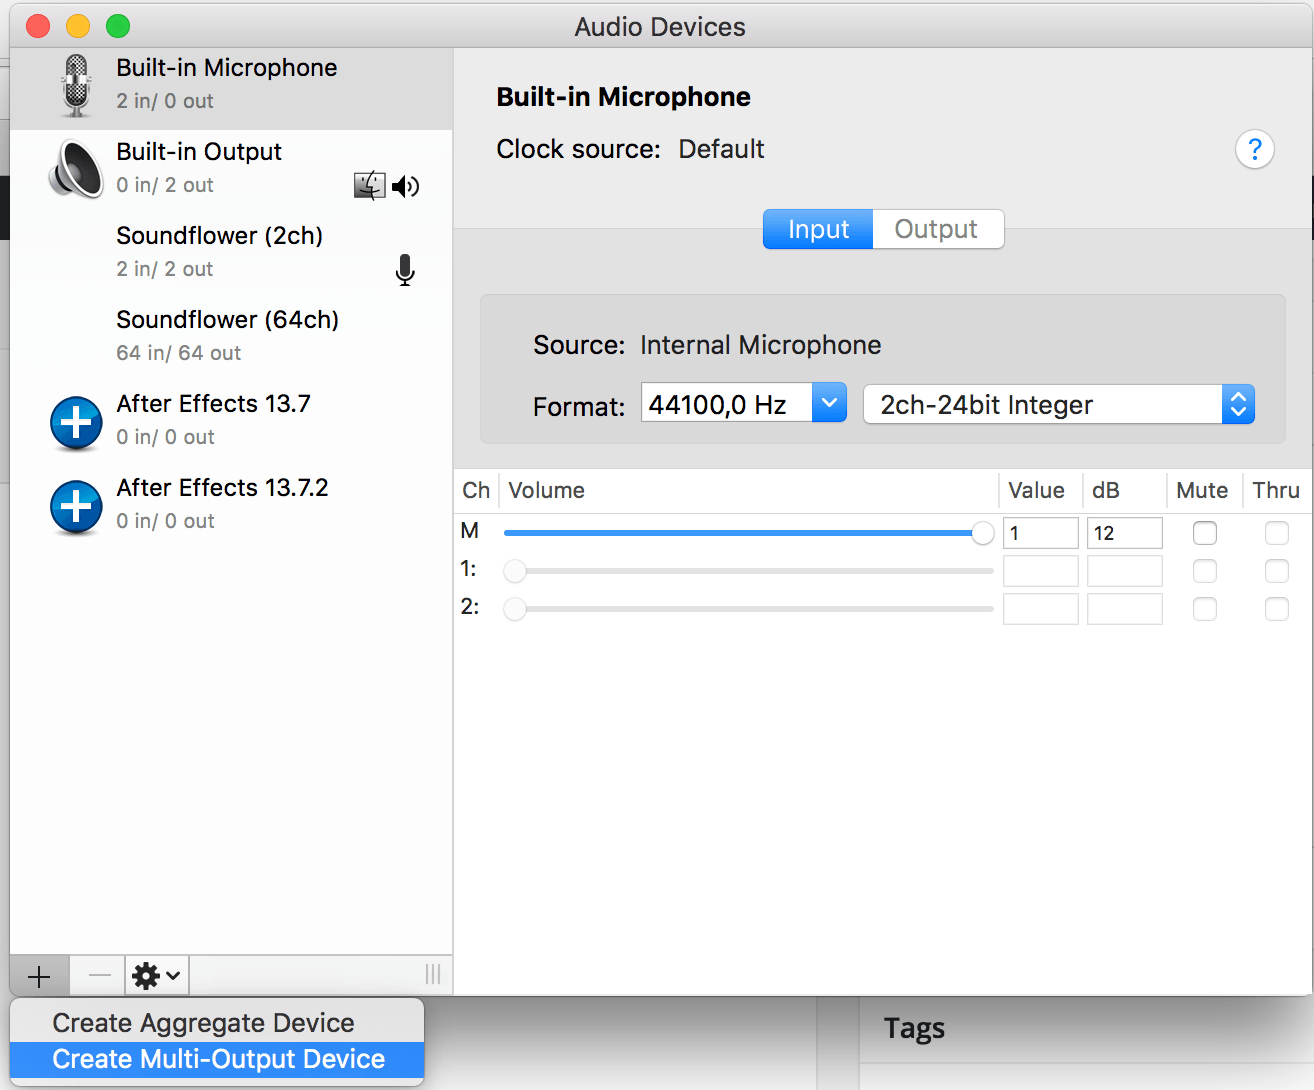
Set up audio device
Go into Audio midi setup and click on the plus sign in the bottom left corner and select Create multi output device
Audio midi setup
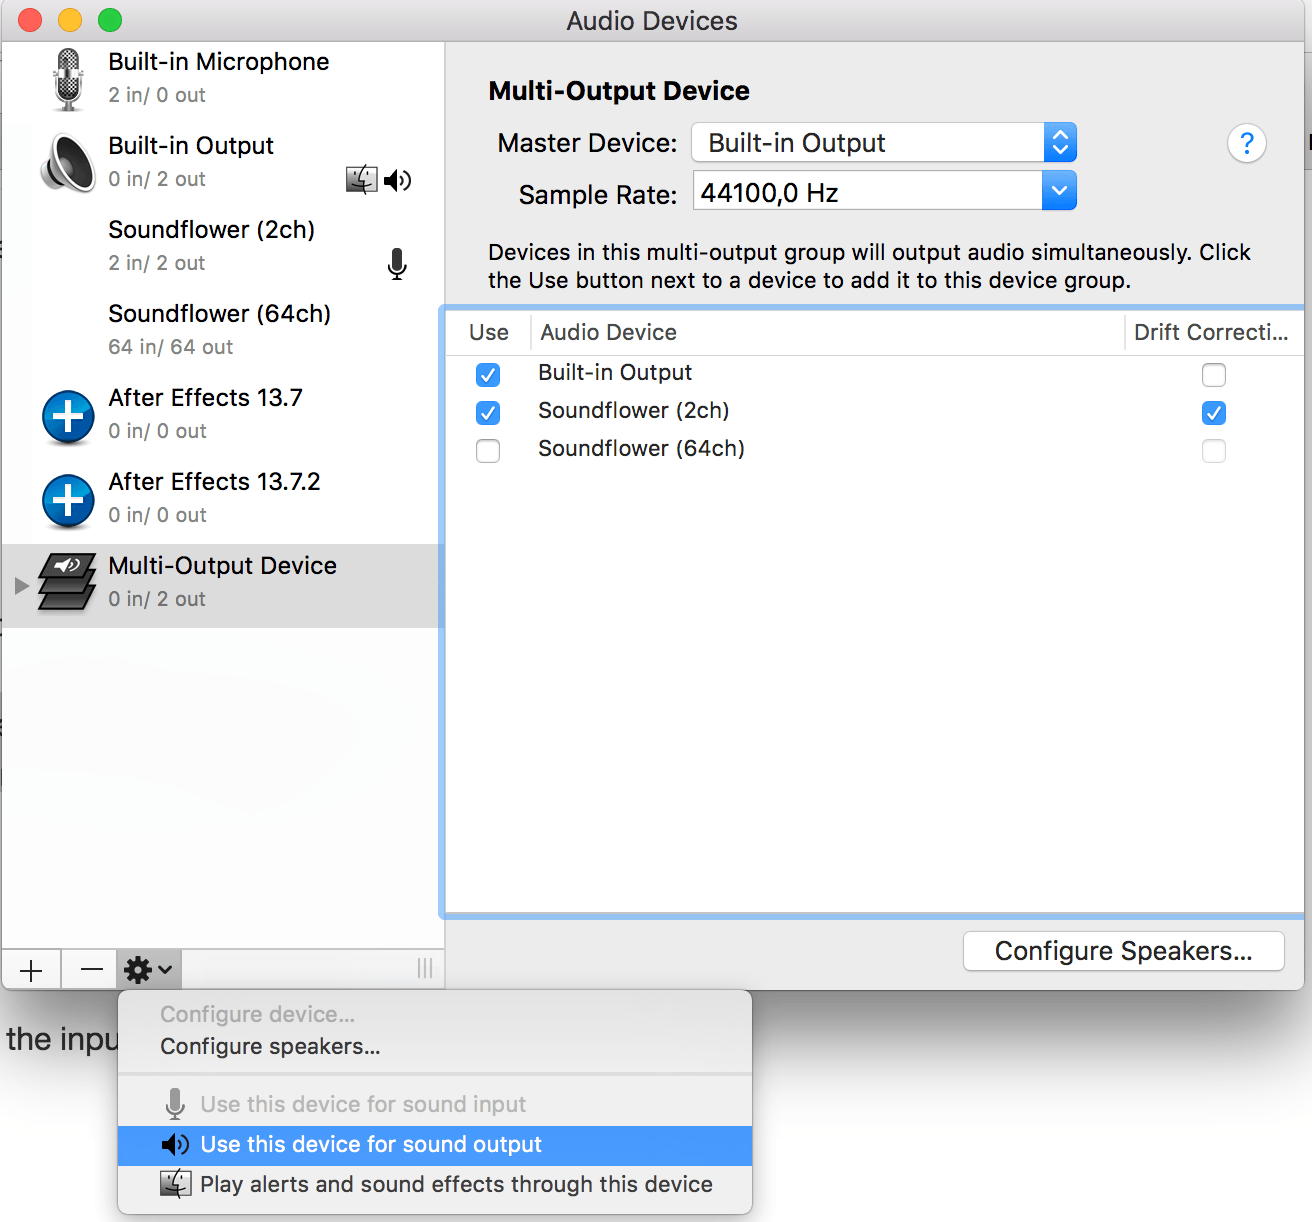
Now select Built in output and Soundflower (2ch). Next click on the gear in the bottom left corner and select Use this device for sound output.
Multi output device
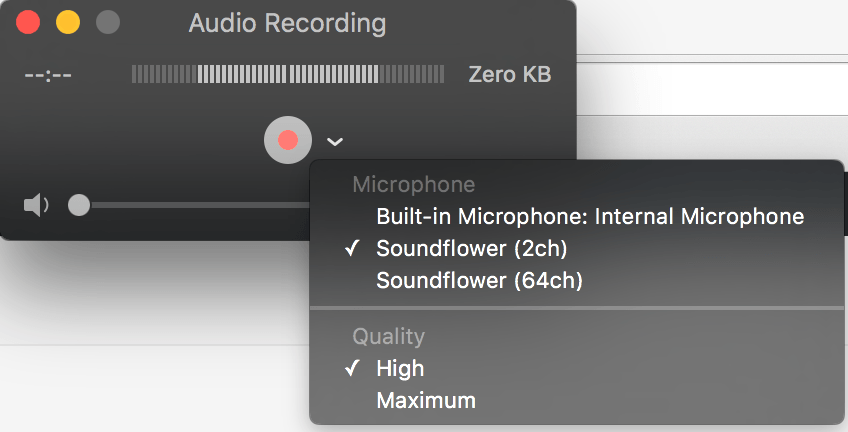
Record with quicktime player
Start quick time player and select File -> New audio recording. Next click on the down arrow next to the record button. Then select Soundflower (2ch).
Quicktime player
Now start the audio you’d like to record and click on the record button in quick time and you are done!
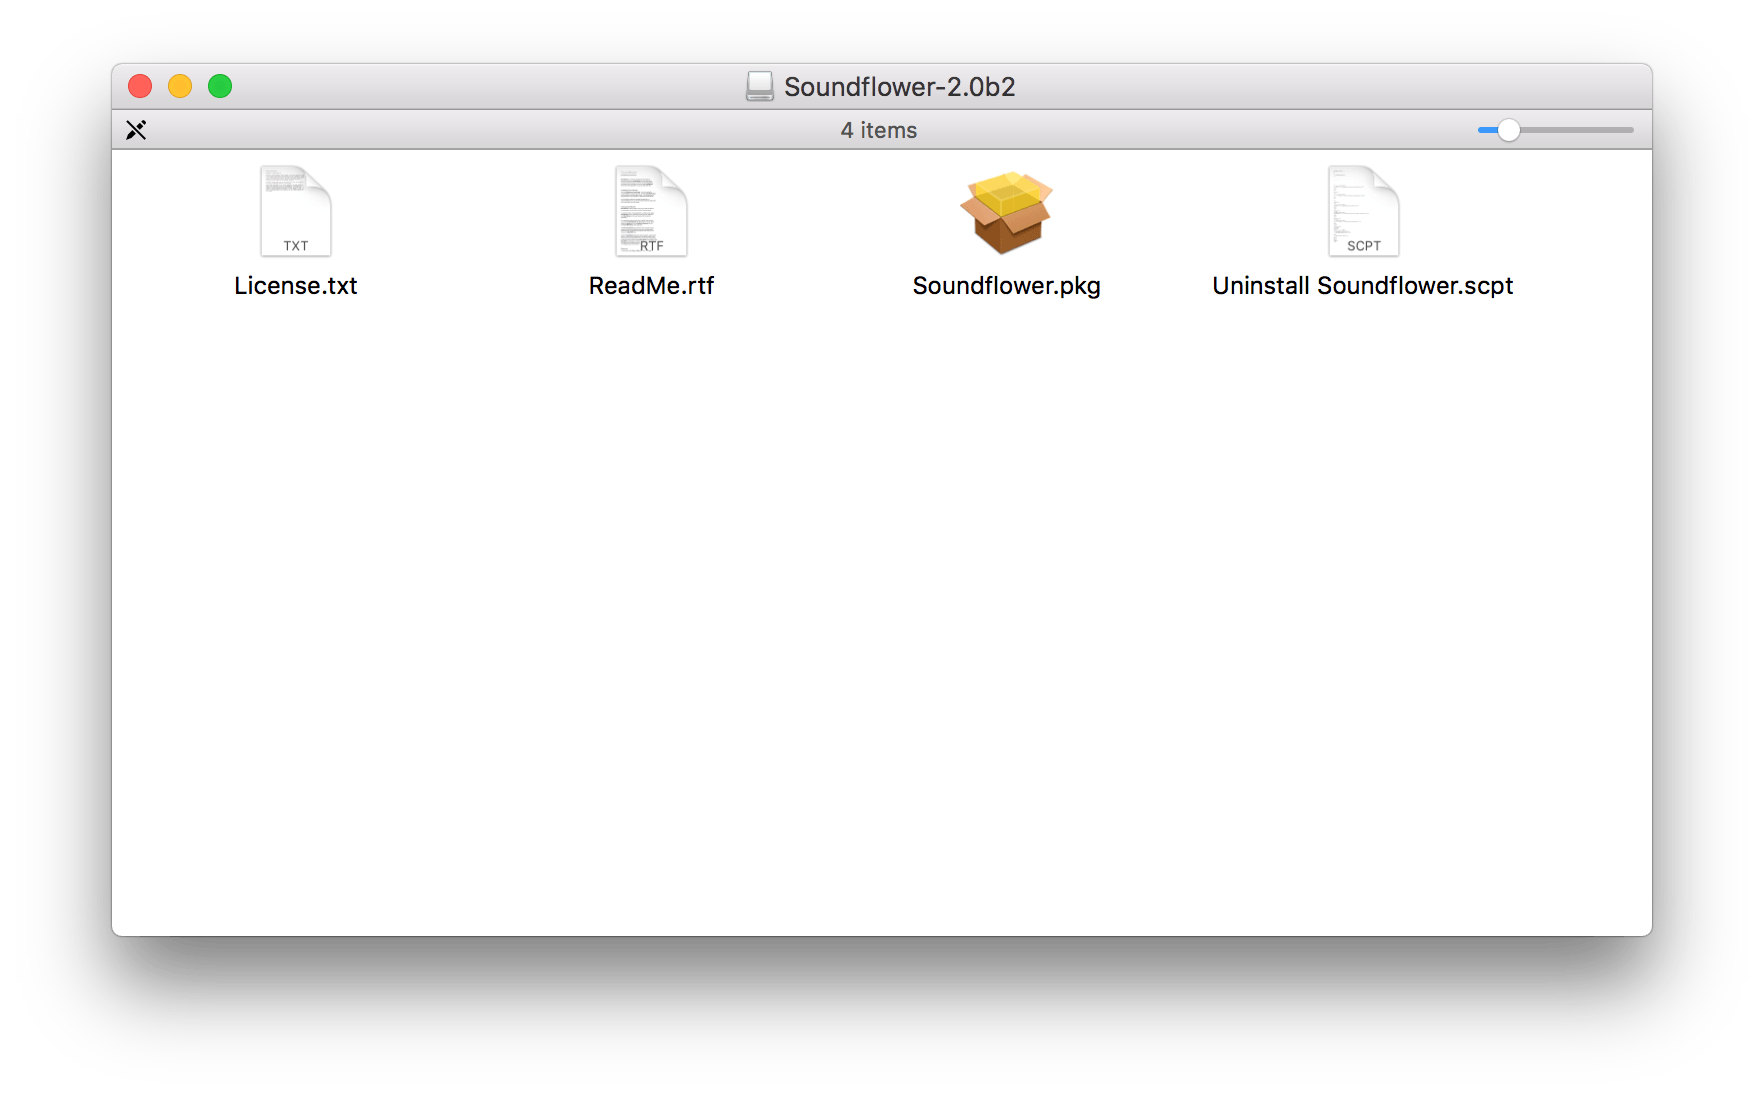
Uninstall Soundflower
To uninstall Soundflower you open or download the .dmg that Soundflower came in again.
soundflower dmg
This time double click on Uninstall Soundflower.scpt and the script editor will open it. Then click on run script and enter administrator password when prompted. A reboot may be required to get rid of the audio devices after the uninstall.