If you use Wordpress and forms, or any other plugin that sends you an email, it could be a good idea to encrypt emails that Wordpress send you. For example Google scans through your inbox looking for words they can use to show ads that is more interesting to you. Or if someone gets hold of your password and can get information on your site via your email. Encrypting the emails will make it harder to extract information from them. And if those arguments are not enough here is another one: it’s fun to work with encryption.
This tutorial expect you to have set up your own private and public keys for email encryption already, if not this will take you around 5 minutes if you follow any of these guides: Encrypt emails for mac, windows and linux.
Install plugin
As Wordpress has such a nice community that provides so many plugins already, there was already a plugin for this as well. So no need to do any coding. Meitar Moscovitz provides us with a plugin called WP PGP Encrypted Emails. So go ahead and install this plugin on your Wordpress site.
Generate PGP Signing key
After activating the plugin a notification shows up that wants you to Generate PGP Signing key. Click that button. That will create a private and public key that is used to encrypt the mail.
Generate PGP signing key
Adding your own public key
After you click Generate PGP signing key-button you will be taken to wp-admin/options-general.php. There you must add your own public key (the one that you generated when following the tutorials above, before installing the plugin) to the field Admin Email PGP Public Key.
Subjects are not encrypted in emails, therefore you have the option to empty them before sending by checking: Always empty subject lines for PGP-encrypted emails
Settings - encrypt mail
At the time this post is being written this plugin does not support attachments being encrypted. You can either wait for it to happen or code it yourself since the plugin is open sourced. Also, i suggest you read a bit on Meitar Moscovitz, he sounds like a very interesting developer.
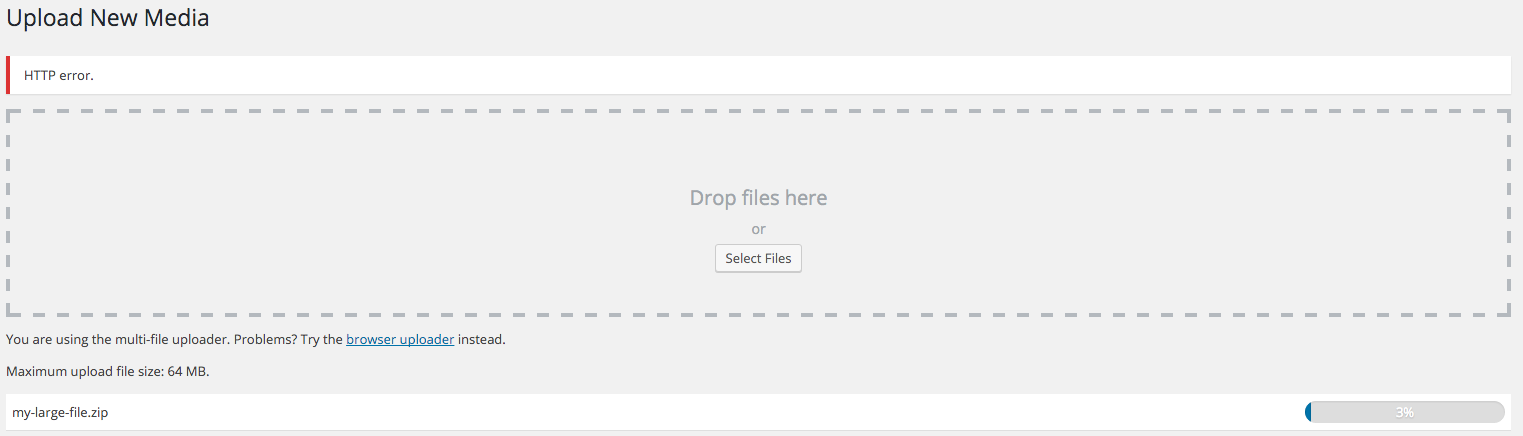
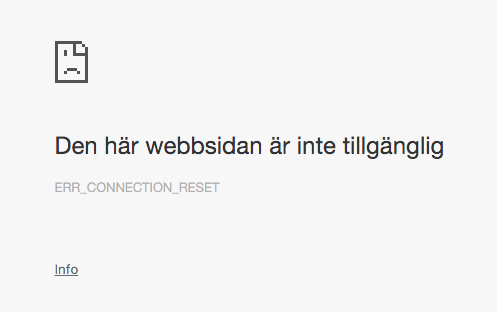
If you have ever tried to upload large file to wordpress and got the HTTP error when using the the multi-file uploader, Or when using the browser’s built-in file uploader and got a ERR_CONNECTION_RESET error message, you can solve the problem with a plugin. This tutorial requires that you have FTP access to the wordpress installation.
This is more of a quick fix than a solution. But it will get the problem out of the way for those single large files one needs to be uploaded.
"The heart of a CMS is the ability to upload and insert content, WordPress does a fantastic job at this, unfortunately, some web hosts have limited servers, or users simply do not have the ability to upload large files through their web browser. Add From Server is designed to help ease this pain, You can upload a bunch of files via FTP (Or your favourite transmission method) and simply import those files from the webserver directly into WordPress."
2. Upload your large file via FTP to your Wordpress upload folder. If you haven’t changed this it’s located in wp-content/uploads.
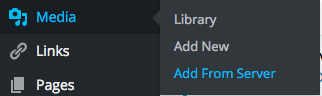
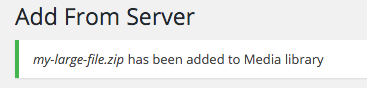
3. Now go to Media->Add from server and browse to the path of the file you uploaded.
Media add from server
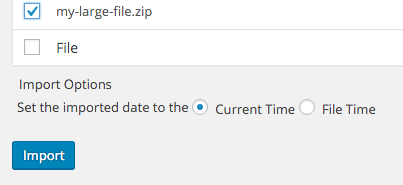
4. Click on the checkbox of the file and click import.
I finally reached that point where I was satisfied with the development of Honkbark Studios new website. So i released it last week. I wanted a site that was playful with a lot of colors but also had some features that will lead the visitor to install Friendsheep or any other game that i will release after.
A few years ago when I released a new Wordpress-site I posted a list of different plugins to add after a wordpress install (It’s written i Swedish so you english speaking people won’t have to read the horrorful piece). It was a really bad idea to do that, because when i read it now i shake my head and think “I would never install these plugins today”… But I am a man of many talents, and one of them is to learn from my mistakes… so this time i’ll do the same mistake but i’ll fix it by using the duct tape equivalent for the written word and advertising; the asterisk. It allows you to write anything you want and bail you out of anything at all at the end of the post, so you don’t have to stand by your words. Great huh?! :)
Four plugins to add after a wordpress installation *
WP Code Highlight.js This plugin makes code pretty readable using highlight.js. Just put your code inside a <pre> and <code> tag and the plugin fixes the rest.
WP Smush Smush all the unnecesarry shit of the pictures you upload to your Wordpress installation. And it does it automatically after upload. Saving space and making your images load faster.
WP Super Cache This plugin caches your site and saves static html files which it serves instead of going through the whole Wordpress lifecycle to get the markup.
Yoast SEO Helps with on-page SEO. Also tells you how to write your blogpost to get the best possible rankings for specific focus keywords.
* = If this post is more than a day old i probably can’t stand by these plugin suggestions.
To setup an Apache Cordova project you need NPM. When you’ve done that you open a terminal.
1. Installing Cordova
sudo npm install-g cordova
2. Create a project
When this is done it’s time to create a project. This is done with the create command. Run the following line but replace CordovaAndGoogleMaps with the name of your project.
cordova create CordovaAndGoogleMaps
3. Add platform
Next it’s time to add platform. At the time when this is being written you can choose from these available platforms: amazon-fireos, android, blackberry10, browser, firefoxos, ios, osx, webos
Lets go for the ios platform, but first go in to the directory of your new project
cd CordovaAndGoogleMaps
cordova platform add ios
4. Running the app
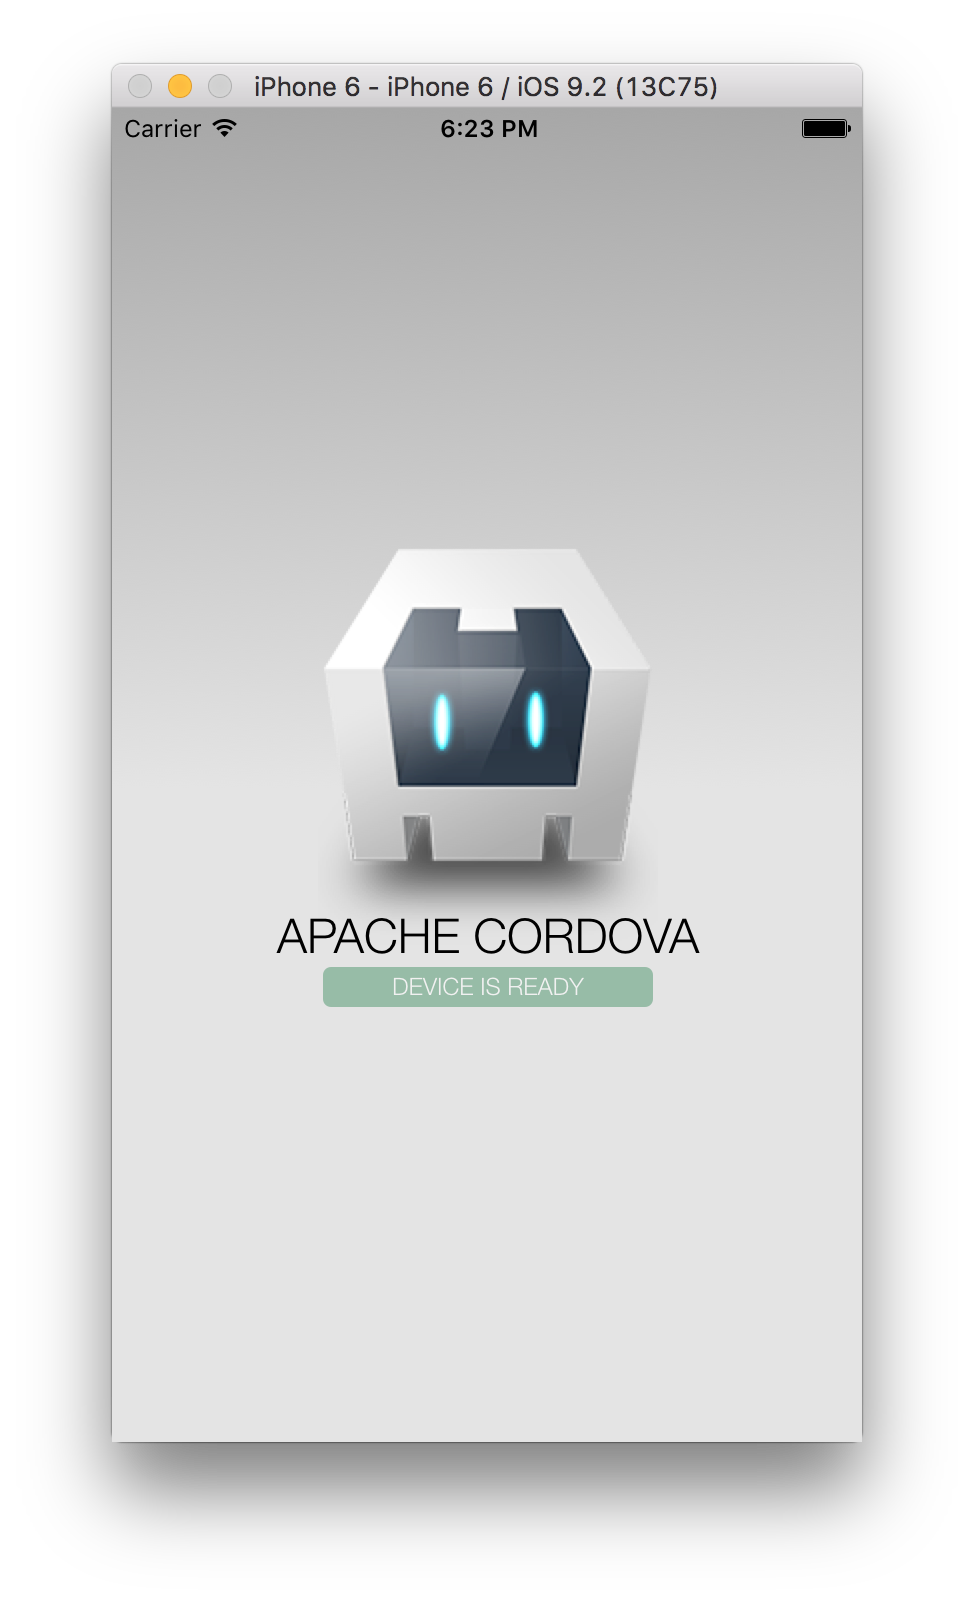
cordova run ios
This will start the iOS simulator and fire up your app, looking like this:
Disabling Sitecore search index update during package install will speed up the installation, making it noticable quicker for large packages. We found a good blog post about this by Alex Shyba. During the implementation of that solution we found an enhancement to do.
Instead of enabling the indexing again after the user clicks “close” in the installation wizard this tutorial will re-enable it directly after the installation is finished (before the user clicks close). This will avoid having the indexing disabled if you open another window or browse away from the sitecore gui directly after installing and not clicking close.
This code is tested in Sitecore 8.
1. Custom packager class
Add a new class that will handle enable and disable indexing and make it look like this (code borrowed from Alex Shyba)
Copy /sitecore/shell/Applications/Install/Dialogs/Install package/Install Package.xml to /sitecore/shell/override Open that file and edit the codebeside attribute to this:
Also add a checkbox to that xml markup between GridPanel and WizardFormIndent
...
</GridPanel><CheckboxID="DisableIndexing"Header="Disable search index update during the install"Checked="True"/></WizardFormIndent>
...
3. Enhancing functionality
The code above is, as said before, borrowed from Alex. Now to enhance this code to re-enable the indexing directly after package is installed but before clicking the close button. Open web.config and search for packageinstall:ended and edit it to look like this:
The EndWizard() method and contents is removed and replaced by another method called OnPackageInstallEnded(). This method is referenced from web.config. And as said before, it’s a smaller risk that the indexing will be left disabled with this approach. The checkbox needs to be static as well, because the wizard and the callback is run by different threads.
Something to think about is that both these solutions might enable indexing for another user if more than one is installing packages at the same time. Thanks to Peter Grace for the ideas!