After doing that step I was happy and tired and didn’t add that key into the info.plist again before going on vacation. Bad move. I spent an hour figuring out why my app wouldn’t start when running react-native run-ios. Instead i got the error No bundle URL Present..
Info.plist
By adding the following to info.plist it started to work again:
There are some steps that need to be taken in order to publish a React Native app to the iOS App Store. But first you need to know how to submit a native app to the app store. That is out of scope for this tutorial since there is a tutorial at Ray Wenderlich that covers that whole process. It helps you with setting up a developer account, create certificates and profiles and so on. After finishing those steps you can continue reading below.
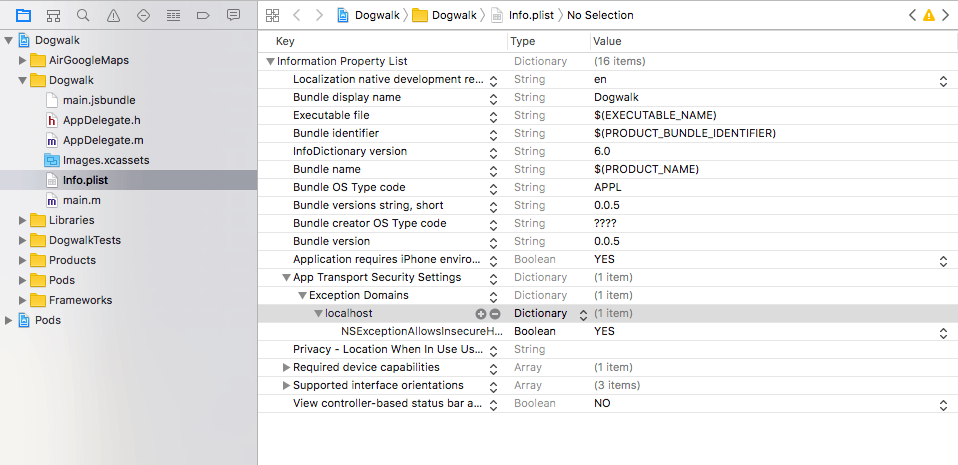
1. Remove localhost from info.plist
First we need to remove the localhost exception from info.plist. By default all traffic over HTTP is rejected since iOS 9 with App Transport Security. React Native has added an exception to localhost to make development easier.
Open info.plist and expand the App Transport Security settings and Exception Domains. Under there you’ll find the localhost entry. Remove it.
Info plist - App Transport Security settings
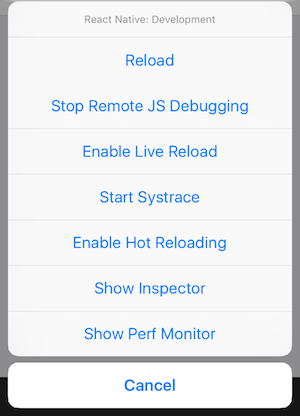
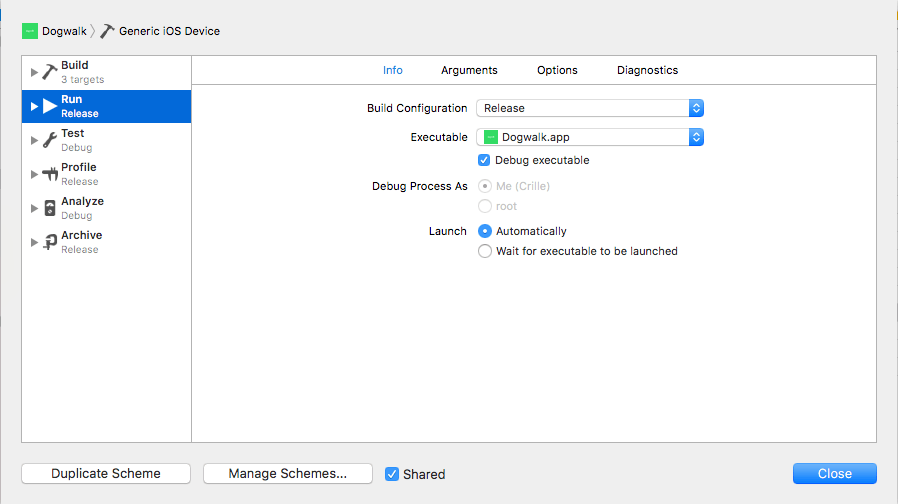
2. Create a release scheme
When building an app for release the React Native Developer Menu will be disabled.
React Native Developer menu - borrowed from official docs
The Javascript files we’ve created for our app will be bundled and put locally in the app so we can test it without being connected to a computer.
Go to Product -> Scheme -> Edit Scheme in XCode. Select Run tab and set the Build Configuration dropdown to Release.
XCode release scheme
3. Build app with release scheme
Select Product -> Build from XCode or build the app from the command line using this command:
I’m interested in trying React native instead of Ionic for Dogwalk. And when doing this i’ll be writing the steps I take if someone else is interested in learning this as well. Now we’ll take a look on how to install React Native.
For React Native we need node, Watchman, React Native CLI and Xcode. Watchman is a service for watching changes in files and trigger actions when that happens. Reactive CLI is the command interface for React Native. Xcode is Apples IDE.
When running git rebase you reapply commits on top of another base tip. Ok, nice what does that mean? The official git docs provides a good explanation of this.
If we have a feature branch called topic created from master at commit E. And if master has new commits before our branches can look like this:
      A---B---C topic
     /
D---E---F---G master
To rebase this branch with master we would use this command:
git rebase master
Our branches would then look like this:
              A'--B'--C' topic
             /
D---E---F---G master
Git rebase interactive
We can also use rebase to, for example, squash or fixup commits that that fits better into an already made commit. This would come in handy after a code review is done and there are changes that fit in other commits.
Say i have this line added to my new feature branch:
the first commit of this new feature
And this line was commited with the message First commit of this new feature
After a code review a new line was added to that file, and a new commit was created
the first commit of this new feature
- This is a line that should have been in the first commit but was discovered missing in a code review
This commit got the message Fixing a code review.
To keep the branch nice and tidy you can squash or fixup these two commits into one.
when running:
git rebase -i master
I would get the following view in my terminal:
pick c7ffd6a First commit of this new feature
pick cfa6850 Fixing a code review
# Rebase cedc856..cfa6850 onto cedc856 (2 commands)## Commands:# p, pick = use commit# r, reword = use commit, but edit the commit message# e, edit = use commit, but stop for amending# s, squash = use commit, but meld into previous commit# f, fixup = like "squash", but discard this commit's log message# x, exec = run command (the rest of the line) using shell# d, drop = remove commit## These lines can be re-ordered; they are executed from top to bottom.## If you remove a line here THAT COMMIT WILL BE LOST.## However, if you remove everything, the rebase will be aborted.## Note that empty commits are commented out
When typing fixup before the code review commit and saving, the commit will meld into the previous commit.
pick c7ffd6a First commit of this new feature
fixup cfa6850 Fixing a code review
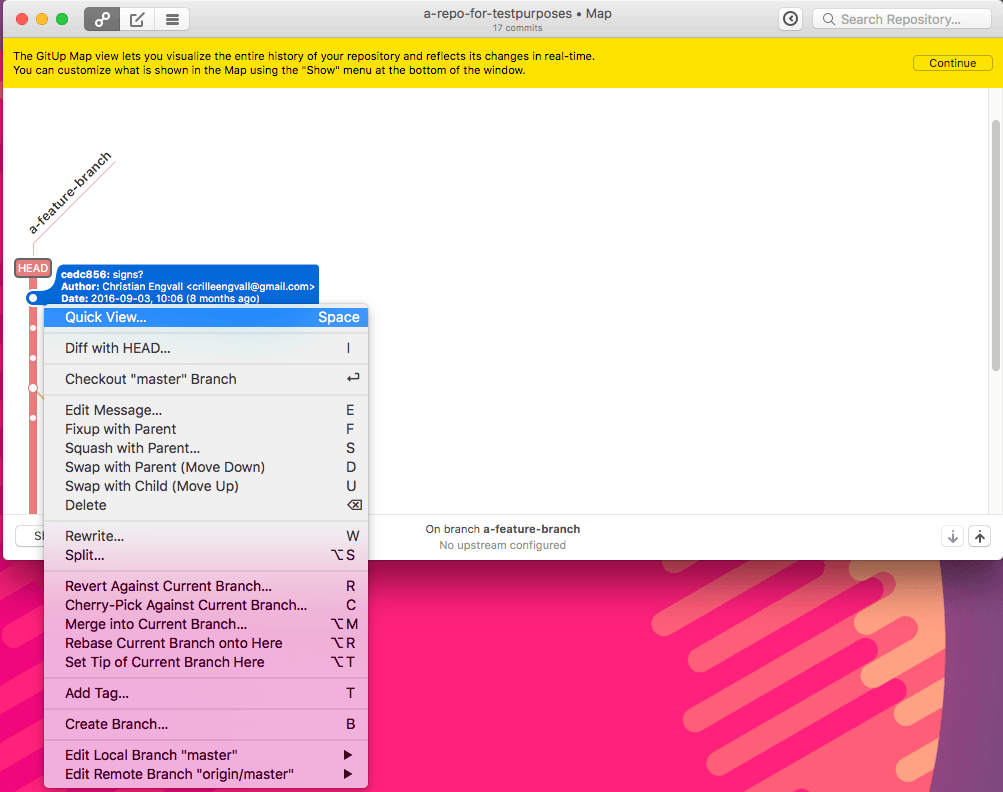
Do git rebase, sqash and fixups with a GUI
You do not need to do this in the terminal if you do not want to. You can use for example GitUp
GitUp Squash and fixups
If you right-click on a commit you get a lot of options for example Fixup with Parent and Squash with parent. But you also have the oiption to Swap with parent (Move down) and Swap with Child (Move up) which you can use before squashing or fixuping if there are other commits between the ones you want to combine.
To complement GitUp you can use the GitHub desktop app to see what your commits contains and which ones should be melded together.
Github Desktop
push and pull after rebase
I work with github as an origin to this repo. To push the repo now when you have done a rebase you need to force the push:
git push origin a-feature-branch -f
For other users that now want to continue to work on this branch they now need to do a:
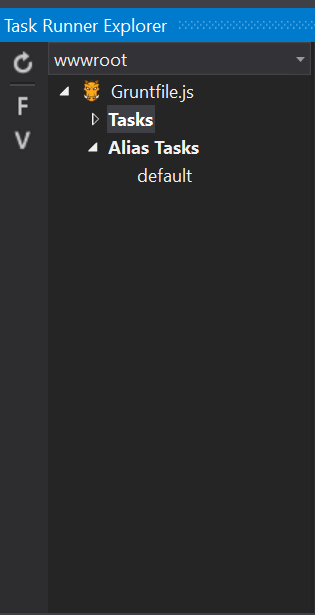
When working in a Visual Studio 2017 solution I started to get this problem when running sass.js task via task runner explorer.
>> File "ui\_checkout.scss" changed.
Loading "sass.js" tasks...ERROR
>> Error: Missing binding C:<path>\node_modules\node-sass\vendor\win32-x64-46\binding.node
>> Node Sass could not find a binding for your current environment: Windows 64-bit with Node.js 4.x
>>>> Found bindings for the following environments:
>> - Windows 64-bit with Node.js 5.x
>>>> This usually happens because your environment has changed since running `npm install`.>> Run `npm rebuild node-sass --force` to build the binding for your current environment.
Warning: Task "sass:dist" not found. Use --force to continue.
Aborted due to warnings.
Completed in 0.796s at Tue Mar 28 2017 13:44:11 GMT+0200 (Central Europe Summer Time) - Waiting...
However I ran into an issue today in which I updated Node.JS outside of Visual Studio, but since VS uses its own install that is separate from any outside installation, you can potentially run into a node_modules package dependency issue where one version of npm installs a package (which makes it rely on that version of Node/npm), and then you can’t run commands in the other version (they break).
Running npm install or npm rebuild node-sass –force, as the error message says, did not help.
How to solve it
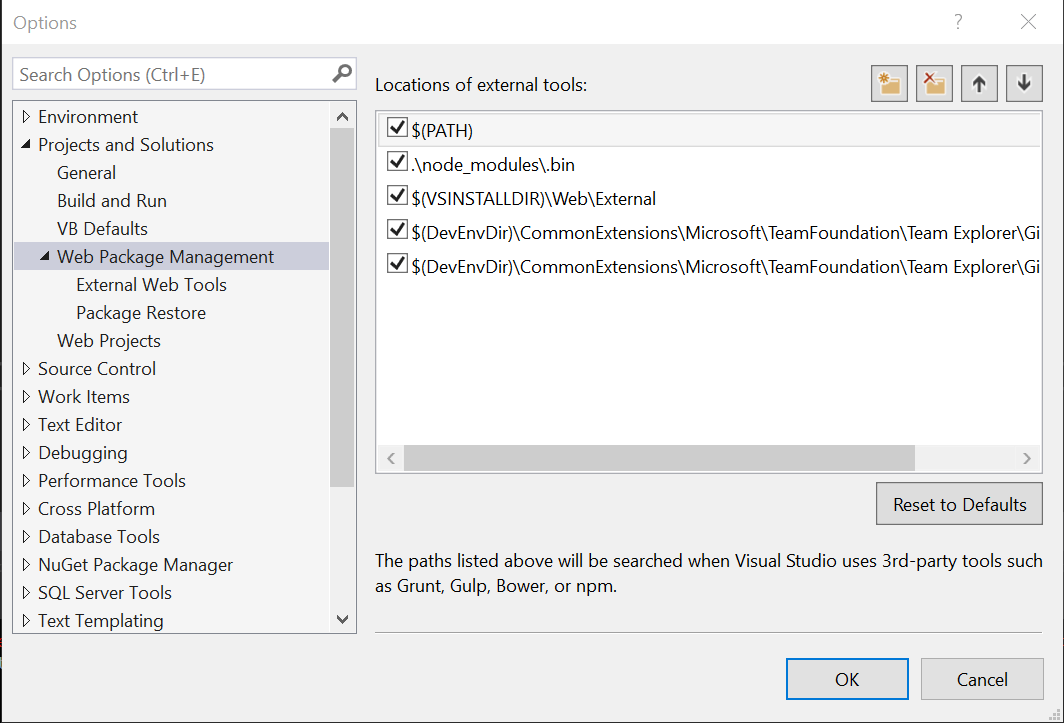
Open Visual Studio 2017
Go to Tools -> Options…
Go to Projects and Solutions -> Web Package Management
move $(PATH) to the top of that list and close that window.