I’ve started working on a gitignore file for Phonegap projects. The .gitignore file can be used with the folder structure explained in Phonegap and multiple platforms. But also with projects only containing one platform.
This post provides an example of how to work with phonegap and multiple platforms. What folder structure to use and how to share the www folder between projects. Platforms used are iOS and Android. This example project can be downloaded at github but i recommend reading the post first.
Folder structure
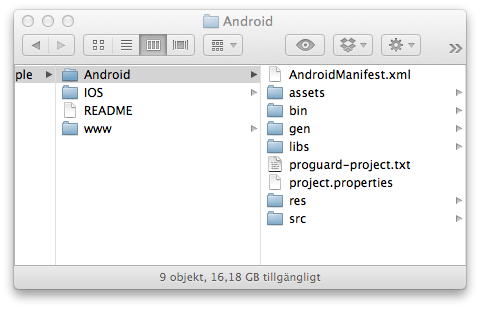
The www folder is located in the top folder and linked in under android and iOS folders (windows phone and blackberry too if you’d like, but thats not covered here) -www -Android -IOS (–WP) (–Blackberry)
Starting with iOS
Start with creating a new Cordova-Based Application following these instructions on the phonegap wiki. But stop when the instruction tells you to copy the www folder and continue here. Save this application in your IOS folder.
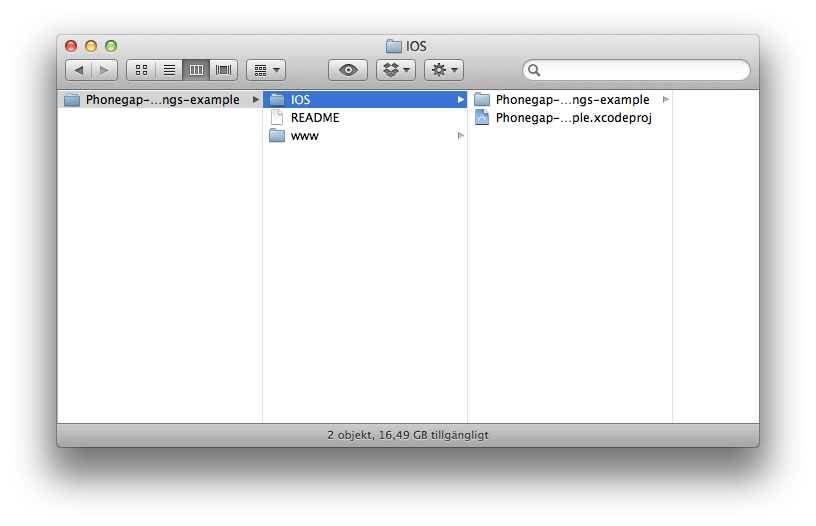
You’re back? Good! let’s continue. Open Finder and navigate to your application. You should see a folder called www in the folder where you created the cordova based application. After copying it to the root folder your folderstructure should look like this:
Folderstructure
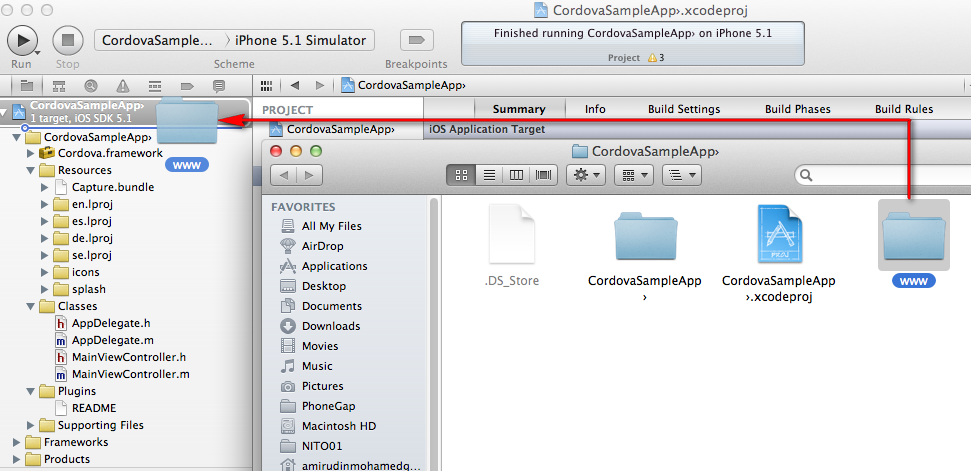
Now drop the www folder into the xcode project(images borrowed from phonegap wiki):
Cordova project
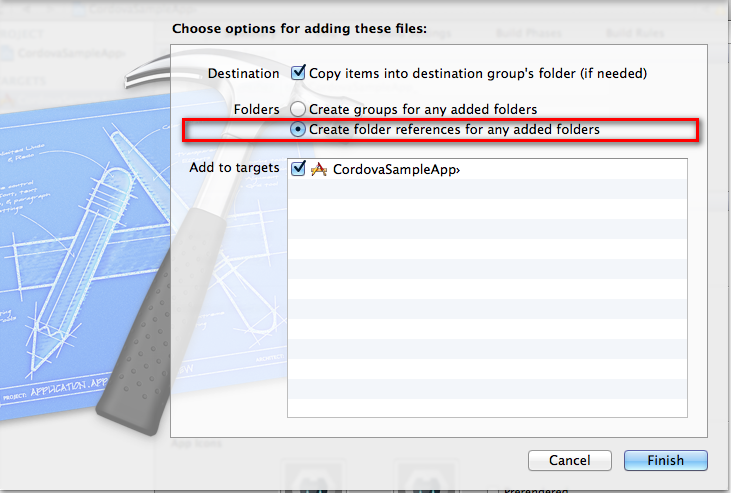
Choose the following options and click finish:
Cordova project options
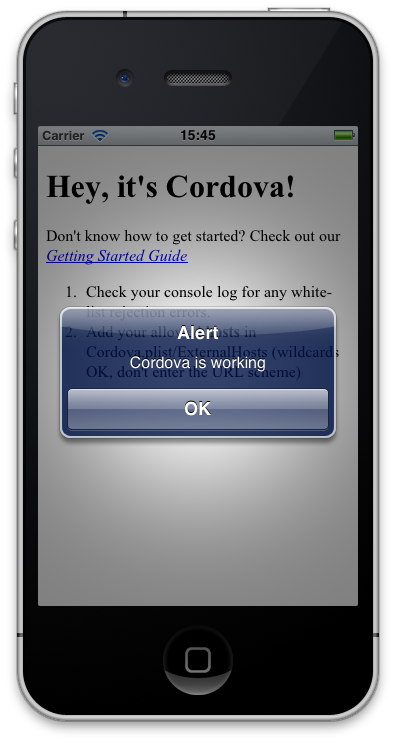
Now click on run and your cordova application is working!
Cordova project in iOS simulator
Now we’re done with the IOS part, Let’s continue to Android and Eclipse.
And we are almost done, but first we must add a reference to the cordova.js file for android. In the phonegap archive you downloaded when you first installed it, you got a folder called lib. And inside that folder you another one called Android/example. If you go navigate to the www folder for that example project you see a file called cordova-1.5.0.js.
Copy that file to your own www folder and rename it to cordova-1.5.0-android.js
Open up index.html and go to the line that now contains this:
And now you are ready to run the project on your emulator or android phone. As i wrote at the top of this post you can download the example project from github to see how i have done it if you’re having trouble.
How to show a Google map in your Phonegap app using Google Map api V3, and what whitelist urls to add to your project. This post expect you know how to set up a new Phonegap project.
1. Start by adding a reference to Google maps api in index.html
the mapOptions variable contains information about zoomlevel, where the center of the map is and what kind of map we want to show. And the line containing the map variable uses getElementById to get our map_canvas and adding the map.
3. Whitelisting google urls
Now we must add the following urls to our Cordova.plist under externalHosts if using Xcode:
*.google.com *.googleapis.com *.gstatic.com
4. Showing the map
To show the map we must run the initialize function in googlemap.js. Since we are using the example index.html from phonegap we add these lines to the onDeviceReady function in index.html
Here we added a function called addMarkersToMap and called it from the initialize function. What it’s doing is adding two markers on our map at the given latitude and longitude. And when we create a new marker object, like markerOne, we give the object the position and which map we want to add the marker to.
But if we run the app now we only see one marker. Let’s fix that.
6. Zooming out the map to show all markers
to zoom out the map without knowing which zoomlevel to use we are going to use the LatLngBounds object from the Google Map API.
Start off by adding the following line first in the addMarkersToMap function:
varmapBounds=newgoogle.maps.LatLngBounds();
and before the closing tag of the function add these lines:
From now on posts will be in English. Hopefully my posts can provide help for more people that way. The posts will be translated one by on but let me know if i forgot to translate something on the site.
Spelling errors
If you find any spelling or any other errors please let me know.
För att schemalägga script i OSX Lion används launchd. Lägg till ett jobb genom att spara en .plist i mappen /Users/%användare%/Library/LaunchAgents. Ett exempel på en .plist är:
<?xml version="1.0" encoding="UTF-8"?><!DOCTYPE plist PUBLIC "-//Apple Computer//DTD PLIST 1.0//EN" "http://www.apple.com/DTDs/PropertyList-1.0.dtd"><plistversion="1.0"><dict><key>Label</key><string>se.christianengvall.phptelldus</string><key>ProgramArguments</key><array><string>/usr/bin/php</string><string>/Users/%användare%/Sites/Telldus/hello.php</string></array><key>StartInterval</key><integer>10</integer></dict></plist>
Under Label namnger man sitt jobb, som man sedan kan se genom att skriva “launchctl list” i terminalen. I ProgramArguments anges att vi vill använda php för att köra filen hello.php. StartInterval anger i sekunder hur ofta jobbet kommer att köras.
i hello.php finns logiken man vill utföra, här är ett exempel som skriver ut ett meddelande i Systemmeddelanden:
<?phpsyslog(LOG_WARNING,"meddelande som syns i sysstemmeddelanden");?>
Starta jobb med launchctl
För att köra jobbet läggs det till genom att skriva följande i ett terminalfönster:
Starta sedan Systemmeddelanden och klicka på “Alla meddelanden” så kommer texten “meddelande som syns i sysstemmeddelanden” dyka upp var tionde sekund.