This code can be used to check if a page in episerver is opened in edit mode. It uses HttpContext.Current.Request.UrlReferrer.LocalPath to see if the word admin or edit exists in the url.
The simple way to use a breakpoint in Xcode is just to click on the line number next to the line of code that needs to be debugged and start to step through the code. But an action can also be added to the breakpoint to speed up the debugging. This post covers three out of the six available actions, as those are the ones i felt are most useful.
To add actions to a breakpoint click on it while holding option(alt) + command When the breakpoint settings are open you click on add action.
Debugger command
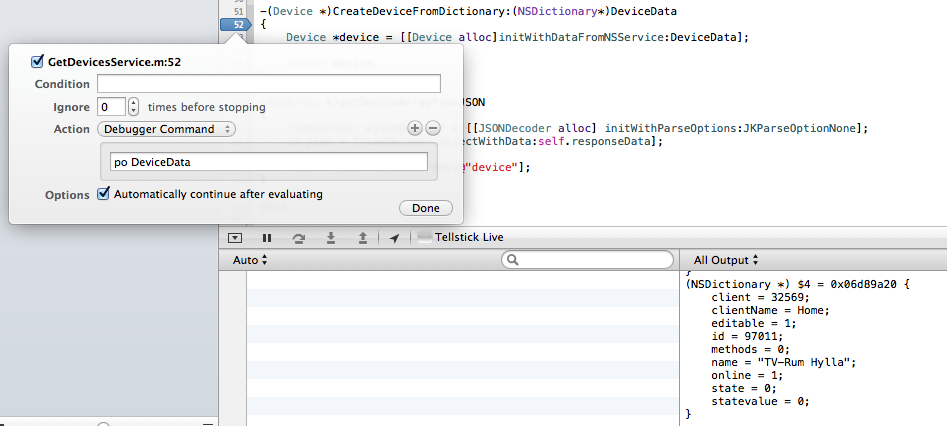
A debugger command is useful when wanting to know what values an object holds while the breakpoint is hit. We can use it to print the values to the debugger output without having to step through the code or write code to output it with NSLOG.
Edit a breakpoint using the shortcut above and select debugger command as action.
In the textbox that shows up a debugger command can be entered. like po foo. foo is changed to a object in the scope of where your breakpoint is located.
Also check the “automatically continue after evaluating” checkbox as we don’t want to stop at this breakpoint.
In the example below I have a breakpoint which outputs the values of a NSDictionary called DeviceData to my debugger window.
Debugger window
Log Message
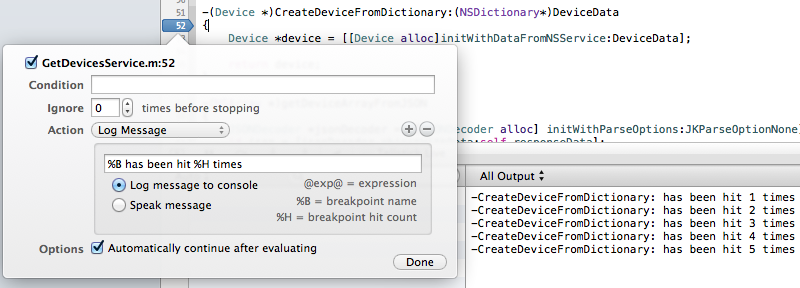
You can also log a message to the debugger console, if you for example want to know how many times a breakpoint is being hit.
To do this select Log message in the action dropdown
Select “Log message to console”.
Type “_%B has been hit %H_ times”
And as we did before we check the “Automatically continue after evaluating”
Log message to console
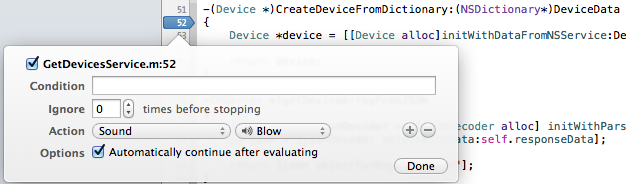
Sound
This action can be used if we are only interested in to see if a message is sent to a method when we run our project.
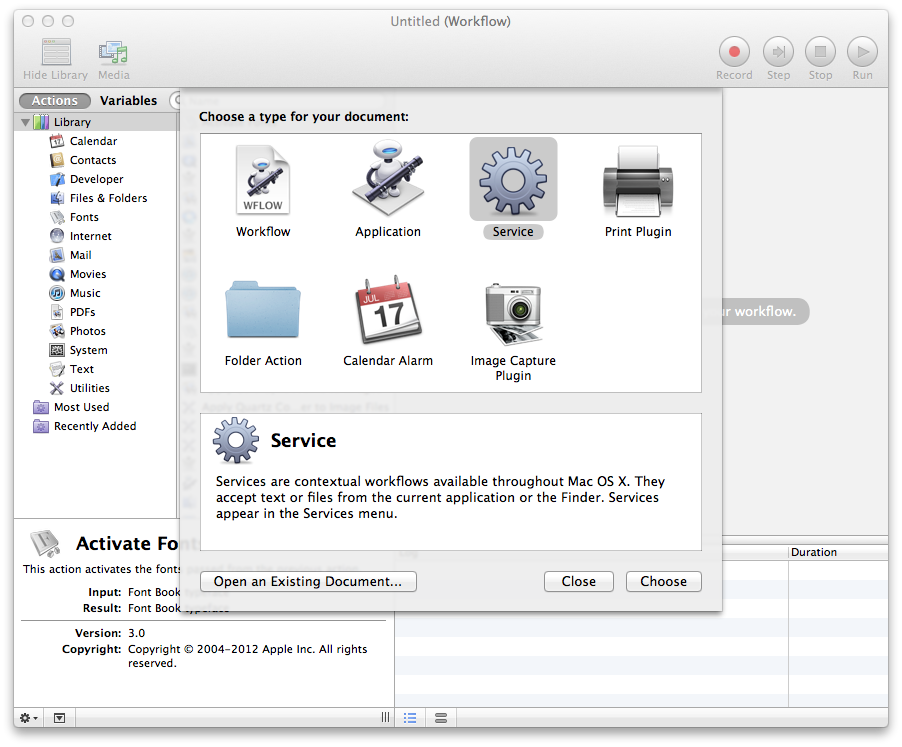
With automator you can add scripts to your right click menu in xcode. We can use this to create a script that helps us keep our #import directives in order. In this example the directives will be sorted in alphabetical order and removing duplicates. Lets start automator and begin.
In automator go to File -> New choose Service as the type and click Choose
Automator
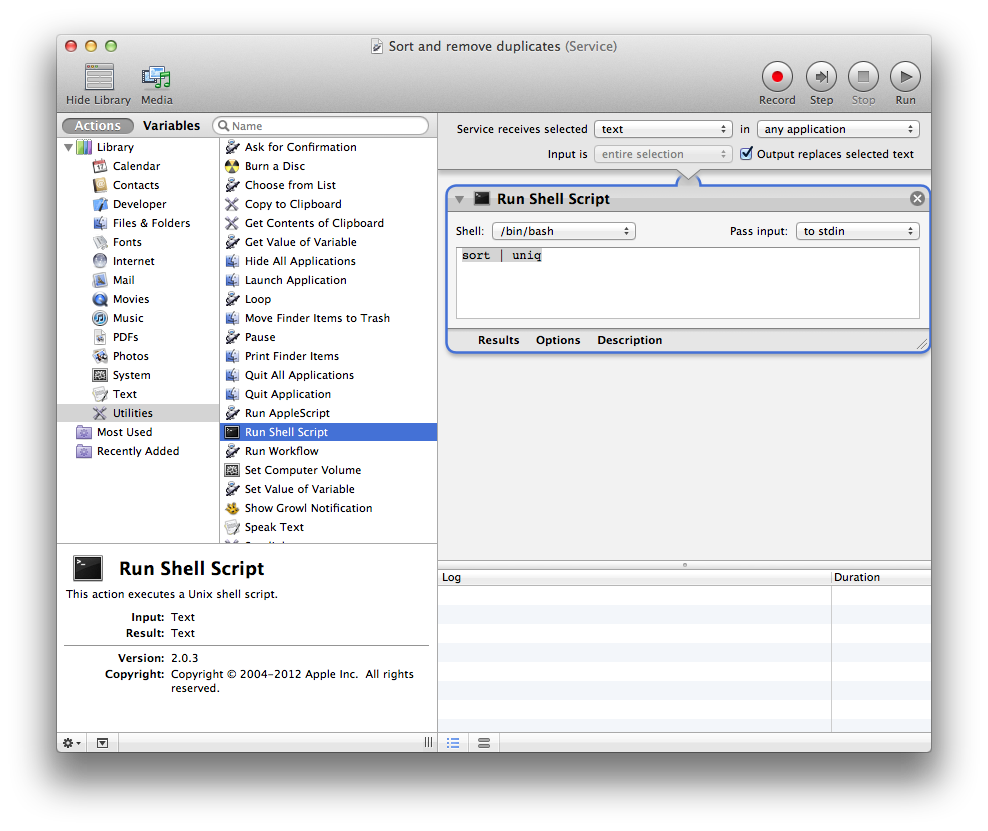
Drag a Run shell script action to the drag actions here… area. Select text in the services recieves selected dropdown. select any application in the in dropdown. Check the Output replaces selected text checkbox
This is where the magic happens. Type the following in your run shell script:
sort | uniq
the automator window should now look like this:
Automator
Choose File -> Save… **and save the service as **Sort and remove duplicates
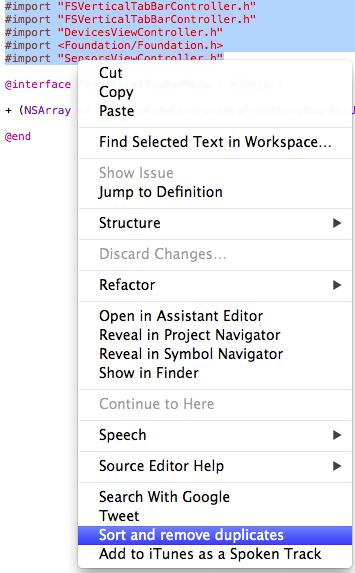
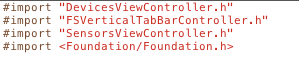
Restart Xcode, open a file with messy #import directives, select them and right click and choose Sort and remove duplicates.
I found this snippet of code at Robert O’Rourkes blog. It easily lets you embed a gist from github to your wordpress posts. Up til now i’ve been using Syntax highlighter evolved which has not been working well all the time. And with this implementation you also get version control.
PHP code
Start of by adding the following to the functions.php file of your theme:
<?php/**
* Usage:
* Paste a gist link into a blog post or page and it will be embedded eg:
* https://gist.github.com/2926827
*
* If a gist has multiple files you can select one using a url in the following format:
* https://gist.github.com/2926827?file=embed-gist.php
*/wp_embed_register_handler('gist','/https:\/\/gist\.github\.com\/(\d+)(\?file=.*)?/i','wp_embed_handler_gist');functionwp_embed_handler_gist($matches,$attr,$url,$rawattr){$embed=sprintf('<script src="https://gist.github.com/%1$s.js%2$s"></script>',esc_attr($matches[1]),esc_attr($matches[2]));returnapply_filters('embed_gist',$embed,$matches,$attr,$url,$rawattr);}
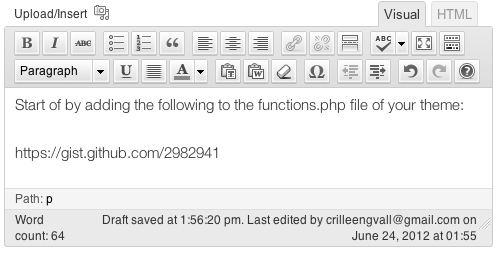
And when you’re done all you have to do is add a link to a post :
Wordpress editor
2015-11-05 Update: I don’t use this approach anymore. Github limits the usage for this service. I now use a wordpress highligher plugin instead.
Converting an NSDate to NSString can sometimes be not as simple as one would hope. NSharpDate is a NSDate category that can help you with this. It adds easy to use methods and properties to the NSDate object.
Example of a method
To get a NSString from a NSDate you need to use a NSDateFormatter. The following code is how you could do it without NSharpDate which would produce a string looking like this: 5/27/12 if the IOS device locale is US, or like this if the locale is Sweden: 2012-05-27.
If you find a bug or want to add a feature to the project you are very welcome to add this code to the category. You can head over to github to fork the project and send me a pull request when you are done.